SolidWorks Intro Part 3
Dave Touretzky
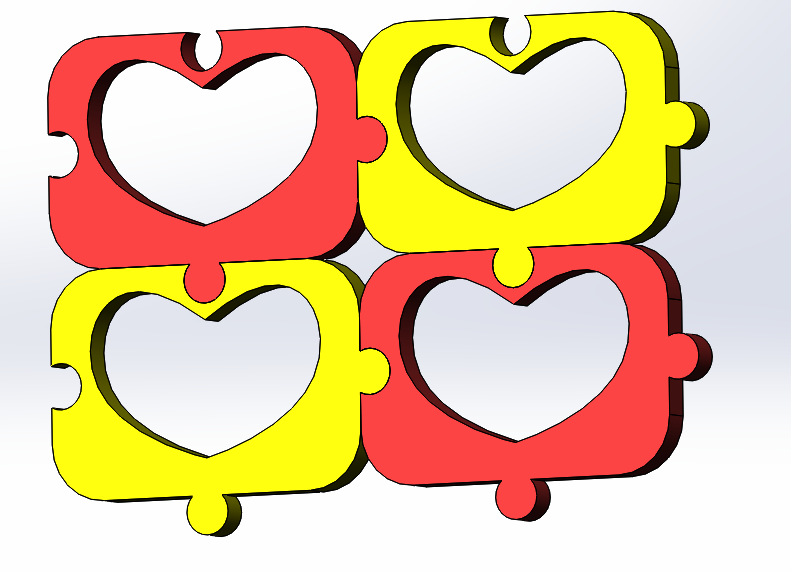
HEART PUZZLE PIECES:

- Start a new part.
- Create an Extruded Base on the front plane.
- Sketch a rectangle whose lower left corner is at the origin.
- Dimension the rectangle to be 1 inch high and 1.5 inches wide.
- Add a vertical centerline through the midpoints, beginning above the top edge of the
rectangle and ending below the bottom edge. To find the midpoint of the top line, slide the mouse along it until a yellow square appears.
- Dimension the horizontal distance from the centerline to the origin to 0.75 inches.
Making curves
- Select the spline tool
- Start a curve by clicking somewhere in the left half of the
rectangle, near the top, but not touching any line.
- Put the second point below and to the left of the first one.
- Double click to end the curve, or hit escape to exit the curve tool.
- If not selected, click on the curve to select it.
- Play with the control points:
- The diamond changes the angle of the curve but not the length.
- The arrowhead changes the length but not the angle.
- The dot changes both length and angle.
- Once the line is bent a bit, snap the two endpoints to the vertical centerline.
- Adjust the control points to make half a heart shape.
- Click on the Mirror Entities tool and mirror the curve to make a heart.
- Click on Exit Sketch and set the extrusion depth to 1/8 inch.
- Save your file as HeartTile.SLDPRT
Making puzzle connectors with trim
- Edit the sketch again, and go to a Normal View.
- Draw a small circle centered slightly outside the right edge of the rectangle, centered on the edge midpoint.
- To do this, select the circle tool and put the mouse on the right edge of the rectangle, which makes the midpoint visible as a yellow square.
- Slide the mouse vertically until you reach the midpoint, then move slightly to the right.
- Draw your circle large enough to overlap the rectangle; the radius should be around 0.1 inches.
- Dimension the horizontal distance from the center of the circle to top right corner of the rectangle to 0.07 inches.
- Dimension the circle diameter to 0.2 inches (radius 0.1 inches).
- Draw another small circle centered slightly INSIDE the left edge of the rectangle, on its midpoint.
- Dimension the horizontal distance between the center of the circle and the origin to 0.07 inches.
- Select the circle, then shift-click to select the other circle, and make them equal.
- Draw a horizontal centerline connecting the centers of the two circles.
- Dimension the distance between the horizontal centerline and the bottom edge of the rectangle to 0.5 inches.
- Click on the Trim Entities tool.
- Click and drag across the line segments you want to delete, so no lines cross.
- Use control-Z to undo if you make a mistake.
- Now you have a puzzle piece.
- Exit the sketch and save the file.
- Repeat the same process to add top and bottom connectors to the puzzle piece.
- Add a 0.25 inch radius fillet to the corners of the piece.
Assembly of Pieces

- Make a new assembly and insert four heart tiles.
- Color two of them red and two yellow.
- Mate them together as if they were puzzle pieces.
- Save your assembly as HeartMosaic.SLDPRT
Correcting for Kerf
- Go to the Evaluate tab and click on Inteference Detection.
- Click on the Calculate button and notice that there is no interference.
- Go back to the HeartTile part.
- Do Insert > Face > Move, and set the move type to Offset.
- Set the offset value to 0.003 inches.
- Click on the innie and outie connector faces.
- Click OK to complete the feature.
- Save the part.
- Go back to the assembly and click on the rebuild button.
- Note the overlap in the pieces.
- Switch to the Evaluate tab.
- Click on "Inteference check", then click on the Calculate button.
THE HOLE WIZARD
Three ways to make a hole:
- Closed contour in a sketch to be extruded.
- Extruded cut.
- The Hole Wizard:
Why you should use the hole wizard:
- Correct sizing for standard fasteners (ANSI or metric).
- Adjustable fit tolerances.
- Proper symbology for machinist drawings.
Hole Wizard Example:
- Start with your HeartPiece part.
- Click on Hole Wizard in the Features tab.
- Click on "Hole" (third entry in the grid of hole types).
- Select "ANSI inch".
- Select "Screw clearance".
- Change the clearance type from "Normal" to "Close".
- Click on the "Positions" tab at the top of the dialog box.
- Click on the face of the part.
- Notice the mouse pointer changes to a point tool. Click to place a point, indicating a hole location.
- Click again to place another point.
- Click on the green checkmark to complete the hole dialog.
- To edit whole positions, open the "Clearance Hole" feature in the Feature Manager tree and
edit the first sketch, which specifies the hole positions.
- The second sketch describes the shape of the hole; don't edit that.
|

