Overview
This page briefly describes how to establish a minimal (safe?) configuration for a new MikroTik router if that device has a USB port (many do, though those that do not can be configured using a different strategy). While MikroTik devices can be configured via the web, and in fact have a web-based quick set-up tool, that tool doesn't cover all cases (e.g., a pure AP bridge) and, to my personal taste, everything reachable from the web-based quick set-up tool has many more features enabled than I would like. Also, personally I am not particularly sanguine about the security of Winbox, so these directions will result in a device which can be administered only via RS-232 or via SSH.
Warning
Following these directions inexactly, or with insufficient understanding, could permanently lock you out of your device. These directions are intended for people who have reasonable familiarity with administering complex devices. Use at your own risk!
Also, these directions include some settings that I believe are more tasteful than the defaults (e.g., 20-MHz channels because I live in an RF-dense setting). You might disagree!
Ingredients
-
These directions are for a MikroTik RB962UiGS-5HacT2HnT ("hAP AC RouterBoard, Triple Chain Access Point 802.11ac") but should apply to many others.
-
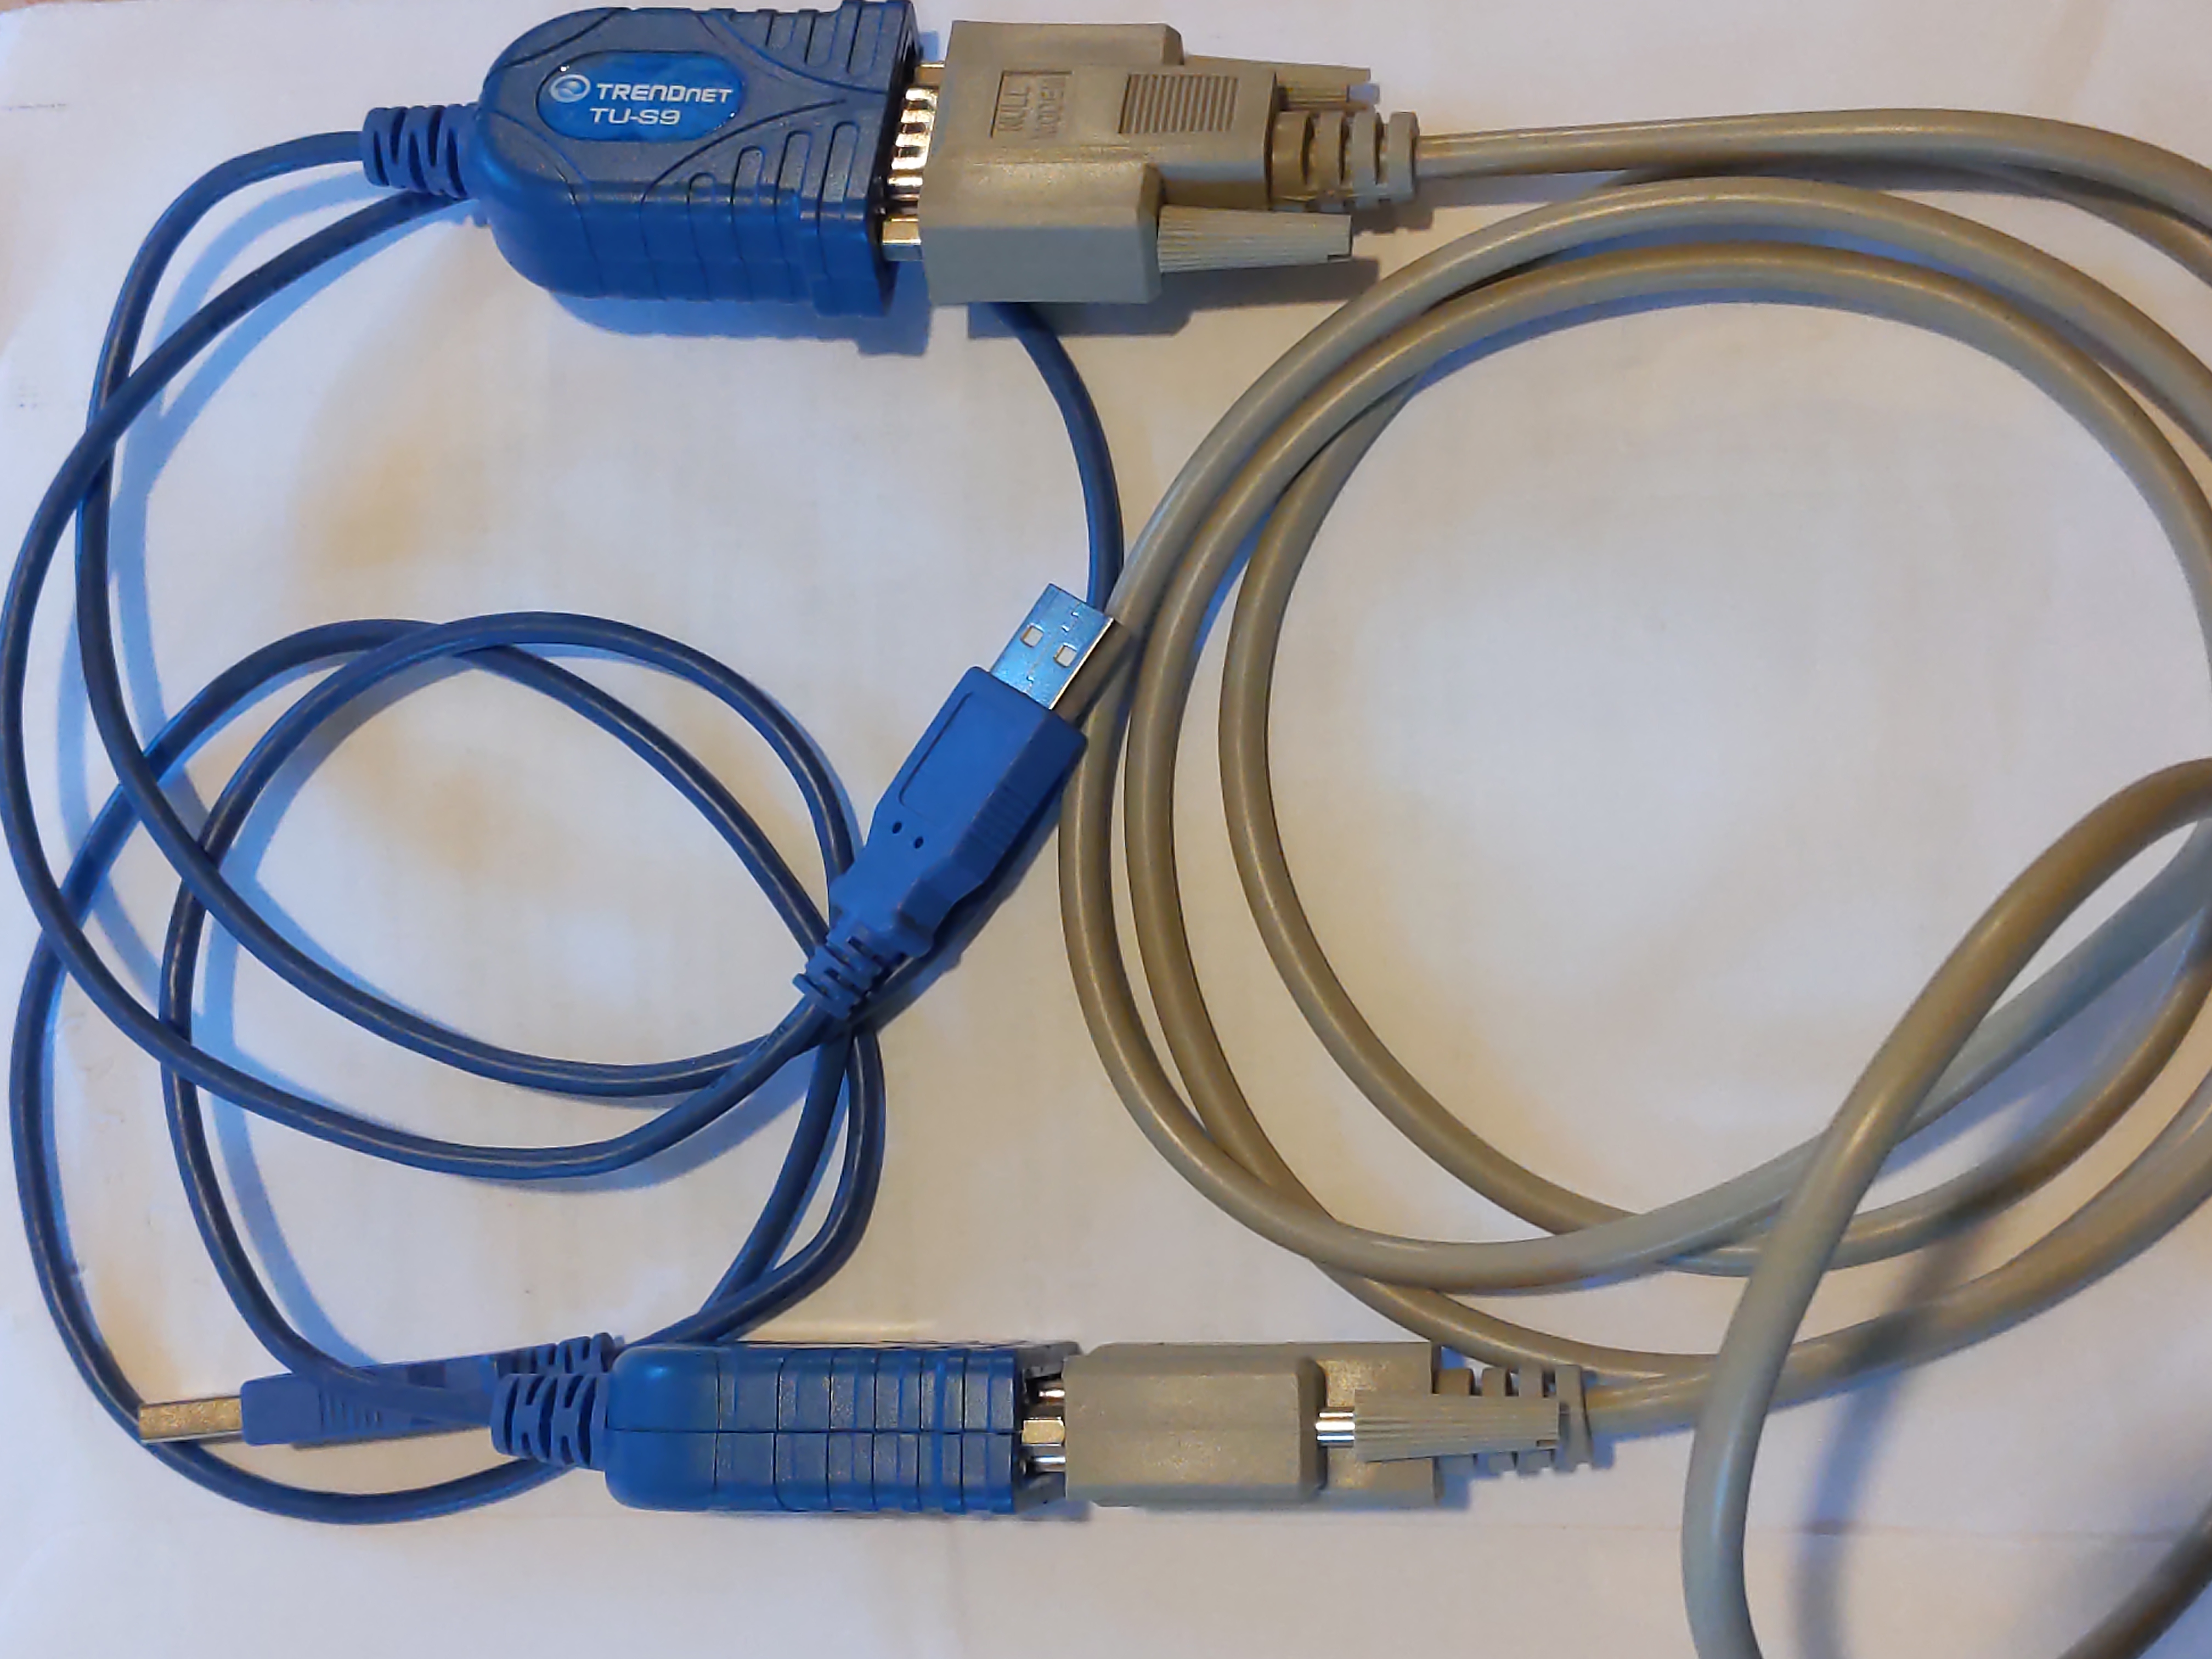
Unless you happen to have a machine with an RS-232 serial port (sadly, this is rare for modern laptops), you will need two USB-to-RS-232 dongles. What I had handy were TRENDnet TU-S9's, but many similar devices will work fine (and two from different manufacturers should be fine).
-
You will need a null-modem "DB9" serial cable. Please be aware that the ecosystem of RS-232 cables is roughly as crazy as the ecosystem of USB-C cables: it is very easy to have a cable that plugs in but does not work. Note that you cannot tell by looking at a cable whether it is straight-through or null-modem (or some other bizarre thing), and it is not enough to have a DB9 serial cable with connectors of the right genders at both ends. The best kind of null-modem cable actually says "null modem" on it. I am being so explicit about this due to having waded through a long FreeBSD forum thread where a wide variety of exotic theories were investigated and discarded, because the original poster thought that a serial cable with the right connectors at both ends must be the right kind of serial cable. But RS-232 is a land abundant in perfidy. Here is a picture of two TRENDnet TU-S9's connected by a null modem cable that says "null modem" on both connectors.
-
I assume that you have an existing "upstream" hard-wired Ethernet connection (e.g., an Ethernet port on the back of your router) and a cable to connect from that to the MikroTik device.
-
Look up the name of your time zone (e.g., "US/Eastern").
-
Take a moment to pick a name for the device -- perhaps you will want to name it after the location where it will be deployed.
-
Also pick an administrative password. You will want something that isn't easily guessable.
-
If your device has Wi-Fi, pick an SSID and a password. For the password you will want something that is actively difficult to guess.
-
You will need some sort of terminal emulator. For example, some versions of Ubuntu ship with a terminal emulator, charmingly written in Python, called miniterm.py. Obviously you can use something else, but you will need to know how to set the baud rate, manage character echo, etc., for whatever you use.
Steps
-
Begin with the MicroTik device powered off. It does not need to be connected to the wired Ethernet, and arguably it would be better if it weren't.
-
Connect a USB-to-RS-232 dongle to each end of your RS-232 cable (which, again, must be a null-modem cable). Connect one dongle to the MikroTik's USB port and the other dongle to your computer.
-
Fire up the serial console program, specifying 115200 bps as the line rate, e.g.,
$ minicom.py /dev/ttyUSB0 115200
If you are using minicom.py you might benefit from changing the linefeed behavior via ^T^L. -
Apply power to the MicroTik device. It will likely beep once, then pause, then beep twice. Around the time it beeps twice you should see output appear.
-
Log in -- the username is "admin" and the password should be blank (hit Return). If this is a fresh device, you will be prompted to enter a password.
-
At this point you are in, but you are talking to a device with lots of pre-existing configuration which you might not want (at least, I didn't). So now we will wipe the device down to super-basic settings. This is not the most risk-free thing to do, because to get back in to the device you will be relying on it re-establishing contact with you via the serial console - the Wi-Fi web UI will not be available.
-
Wipe the configuration via:
/system reset-configuration no-defaults=yes skip-backup=yes
The device should reboot and once again contact you via the serial console. Once again you should log in as "admin" and set a password. -
Tell the device about itself, modifying the values as appropriate for your situation. Note that 24-hour time is expected.
/system clock set time-zone-name US/Eastern
/system clock set date jun/06/2022
/system clock set time 03:07:00
/system identity set name="upstairs_closet" -
Turn lots of things off:
/ip service disable telnet,ftp,www,www-ssl,winbox,api,api-ssl
/ip service enable ssh
/ip service print
/ip dns set allow-remote-requests=no
/ip neighbor discovery-settings set discover-interface-list=none -
Establish a basic network setup on Ethernet port 1:
/interface bridge add name=bridge1 \
admin-mac=[/interface/ethernet/get value-name=mac-address ether1] \
auto-mac=no
/interface bridge port add bridge=bridge1 interface=ether1
/ip dhcp-client add disabled=no interface=bridge1 -
At this point you can plug in the wired Ethernet connection. If you wait a few seconds the device should acquire an IP address and you should be able to contact the outside world, e.g.:
/ping 8.8.8.8 count 5 -
Upgrade RouterOS:
/system package update
set channel=long-term
check-for-updates
download
/system reboot
If updates were downloaded, the rebooting might take a while (don't be worried if it takes a minute or so extra). -
After the system comes back up, log in again, and this time we want to update the device's BIOS.
/system routerboard upgrade
/system reboot
This reboot should be fairly quick. -
At this point you should be able to log in via SSH. The IP address you will use depends on what your DHCP server did, so I can't help you much on that front. But you can also press on (assuming your device has Wi-Fi) via the serial connection.
-
First we will establish a "security policy" for the Wi-Fi interface(s) we will be activating:
/interface wireless security-profiles
set [ find default=yes ] \
authentication-types=wpa2-psk mode=dynamic-keys \
supplicant-identity=MikroTik \
wpa-pre-shared-key="Wi-Fi password goes here" \
wpa2-pre-shared-key="Wi-Fi password goes here" -
Now we will set up a 2.4 GHz (802.11b) interface.
/interface wireless
set [ find default-name=wlan1 ] band=2ghz-b/g/n channel-width=20mhz disabled=no \
wireless-protocol=802.11 distance=indoors installation=indoor frequency=auto \
mode=ap-bridge default-forwarding=no \
ssid="SSID goes here" station-roaming=enabled -
Now we will bridge that interface to Ethernet port 1:
/interface bridge port add bridge=bridge1 interface=wlan1
At this point you should be able to establish a Wi-Fi connection and (assuming the ping command worked) connect to the Internet. -
If your device also supports 5 GHz you will set up and bridge a second wireless interface:
/interface wireless
set [ find default-name=wlan2 ] band=5ghz-a/n/ac channel-width=20mhz disabled=no \
wireless-protocol=802.11 distance=indoors installation=indoor frequency=auto \
mode=ap-bridge default-forwarding=no \
ssid="SSID goes here" station-roaming=enabled
/interface bridge port add bridge=bridge1 interface=wlan2 Done! Well, you should remember to do the upgrade steps weekly. And it would be possible to disable packages that you aren't going to use, e.g., MPLS.
/system package
disable mpls
disable hotspot
disable ppp
/system reboot
Other useful commands
/system package update print
/system health print
/system resource print
/system package print
/system ntp client print
/export terse
/interface bridge host print
/interface wireless registration-table print
/interface wireless snooper snoop wlan1
/interface wireless spectral-scan wlan1
/interface wireless spectral-history wlan1
/ping 8.8.8.8
Other efforts
Here are some pages I consulted.