Installation Notes for Serpent on 64-bit Windows 10. These notes were updated Jan 2021 to change wxWidgets version to 3.1.2, which is what I'm using. I have not checked this whole procedure from a fresh start.

Roger B. Dannenberg

There are two versions of serpent; one is a command line program and the other is a graphical interface program:
Serpent is currently released as an SVN repository and in three files (the "nnn" is the corresponding SVN version number):
The "win" exe is an installer with pre-compiled programs. The "src" zip file contains sources for all platforms.
This file describes installing true 64-bit applications on 64-bit Windows. Currently, the 64-bit version of Serpent is more actively used and supported, and is therefore recommended. Contact me if you need a 32-bit version.

Installing Compiled Programs

You should be able to simply download serpent-win-nnn.exe to your machine and run it to install serpent64 and wxserpent64. The installer will also set the registry with a search path to serpent libraries (lib, programs, and wxslib are on the path). The installer will also ask permission to add the installation directory to your Windows environment Path variable, but the setting does not take effect until you log out and log in again.
The executables are (for Windows): serpent64.exe and wxserpent64.exe.

Three things to keep in mind:
  1. Both serpent64 (a command line program) and wxserpent64 (serpent with graphical toolkit) should be run from the command line.
  2. To run an executable from a command line, your system must be able to find it. The installer will modify your Path. If you move the installed code (default is in Program Files (x86)\Serpent), you will need to update the Path as well:
  3. You also need a path for Serpent (called SERPENTPATH). The installer will try to set SERPENTPATH (without asking). Indications are that Windows 8 blocks the installer, so you may have to do this step manually. Also, if you move the installation or want to add other directories, set the entry yourself. To manually change SERPENTPATH, go to (or create) the registry entry:
    "My Computer\HKEY_LOCAL_MACHINE\SOFTWARE\CMU\Serpent\"
    and add a new string value there named "SERPENTPATH".  Set the Data (value) to the path. On a default installation, this Data is "c:\Program Files (x86)\Serpent\lib\;c:\Program Files (x86)\Serpent\programs\;c:\Program Files (x86)\Serpent\wxslib". (The quotes are not part of the Data.) To set this, go to the Start menu and select "Run...", then type in "regedit" and click "OK". Use this editor to create and set the path. The RegEdit program gives you access to all kinds of critical internal settings for your machine. Be careful.

Testing:

Run serpent64 from a command prompt:
serpent64
> print "hello world"
hello world
> exit()

This will run the init.srp in lib, which is a good simple test.

Try
wxserpent64 wxs_test.srp
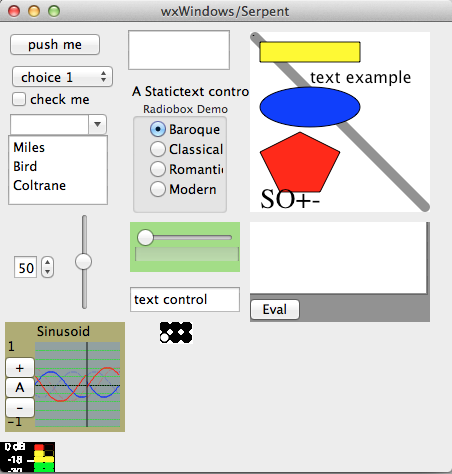
to test wxserpent64 and see a variety of input controls. The screen will look something like this:
wxs_test.srp screen capture

Building From Sources

Get Serpent source code. If you want to build from sources, get the "src" zip file. You can also get the very latest sources from SourceForge using SVN (subversion, a configuration management tool). The Linux command to create a serpent directory (in the current directory) with the lastest sources is:
svn checkout svn://svn.code.sf.net/p/serpent/code/trunk serpent
or, if you are a developer and plan to commit changes back to SourceForge,
svn checkout svn+ssh://rbd@svn.code.sf.net/p/serpent/code/trunk serpent
Important: If your serpent directory contains trunk, tags, and branches, check the code above and try again. For these instructions to work, all the repository files in trunk must be copied to the local working copy named serpent. E.g. you should have serpent/README.txt, serpent/32bit, and serpent/64bit. If you install liblo, for example, you should have liblo in the parent directory of serpent, i.e. it will be serpent/../liblo.

I use Tortoise SVN and Microsoft Visual Studio Community 2017 v.15.5.4 for Windows on Windows 10 Pro. Here's how I build from sources on Windows. First, I list all the things to download; then, I give instructions on what and how to build: