Creating your personal access token
-
Verify your email address, if it hasn’t been verified yet.
-
In the upper-right corner of any page, click your profile photo, then click Settings.

-
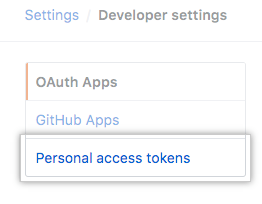
In the left sidebar, click Developer settings.

-
In the left sidebar, click Personal access tokens.
-
Click Generate new token.

-
Give your token a descriptive name.

-
To give your token an expiration, select the Expiration drop-down menu, then click a default or use the calendar picker.

-
Select the scopes, or permissions, you’d like to grant this token. To use your token to access repositories from the command line, select repo.

-
Click Generate token. Make sure to copy it so that you can use it!

-
Warning: Treat your tokens like passwords and keep them secret. When working with the API, use tokens as environment variables instead of hardcoding them into your programs.
Using and caching your token
Do the follow from the terminal:
First, configure the local GIT client with a username and email address,
$ git config --global user.name "your_github_username"
$ git config --global user.email "your_github_email"
$ git config -l
Once GIT is configured, we can begin using it to access GitHub.
Example:
$ git clone https://github.com/YOUR-USERNAME/YOUR-REPOSITORY
> Cloning into `Spoon-Knife`...
$ Username for 'https://github.com' : username
$ Password for 'https://github.com' : give your personal access token here
Now cache the given record in your computer to remembers the token:
$ git config --global credential.helper cacheNow try to pull with -v to verify
$ git pull -vIf needed, anytime you can delete the cache record by:
$ git config --global --unset credential.helper
$ git config --system --unset credential.helper