Abstract
This activity is designed to facilitate hands-on learning about the effects of drag on moving vehicles, through a series of wind tunnel experiments and a practical road test of miniature toy cars, which are designed by the participants.
Children will have the opportunity to mix and match different car components and test them in a small wind tunnel. They can then modify their design to make improvements, re-testing and enhancing their designs until they are satisfied with their vehicles. At that point, their final design may be tested on a track, powered by its own tiny CO2 container, in order to evaluate its practical performance on the test course.
The children will be able to use hands on experiments to develop an intuitive understanding for the practical ways in which a vehicle’s geometry and cross sectional area is related to the amount of drag exerted upon it. Also, the iterative cycle of design, testing, and modification will encourage the students to develop a better understanding of the engineering discipline in general.
Goal
This activity is designed to engage children in active hands-on learning about the practical effects of aerodynamic drag on vehicles moving at high speeds.
How It Works
The children experiment with aerodynamics by placing a variety of different LEGO vehicles into a wind tunnel and observing how strongly the high speed winds push against vehicles of various shapes and sizes.
What and How the Children Learn
● The children will develop an intuitive understanding for the relationship between a vehicle’s frontal cross-sectional area and the relative amount of wind resistance that it encounters at high speeds
● This will be done by testing a number of vehicles of significantly different shapes and sizes in a miniature wind tunnel and intuitively correlating the frontal area of a vehicle to its performance
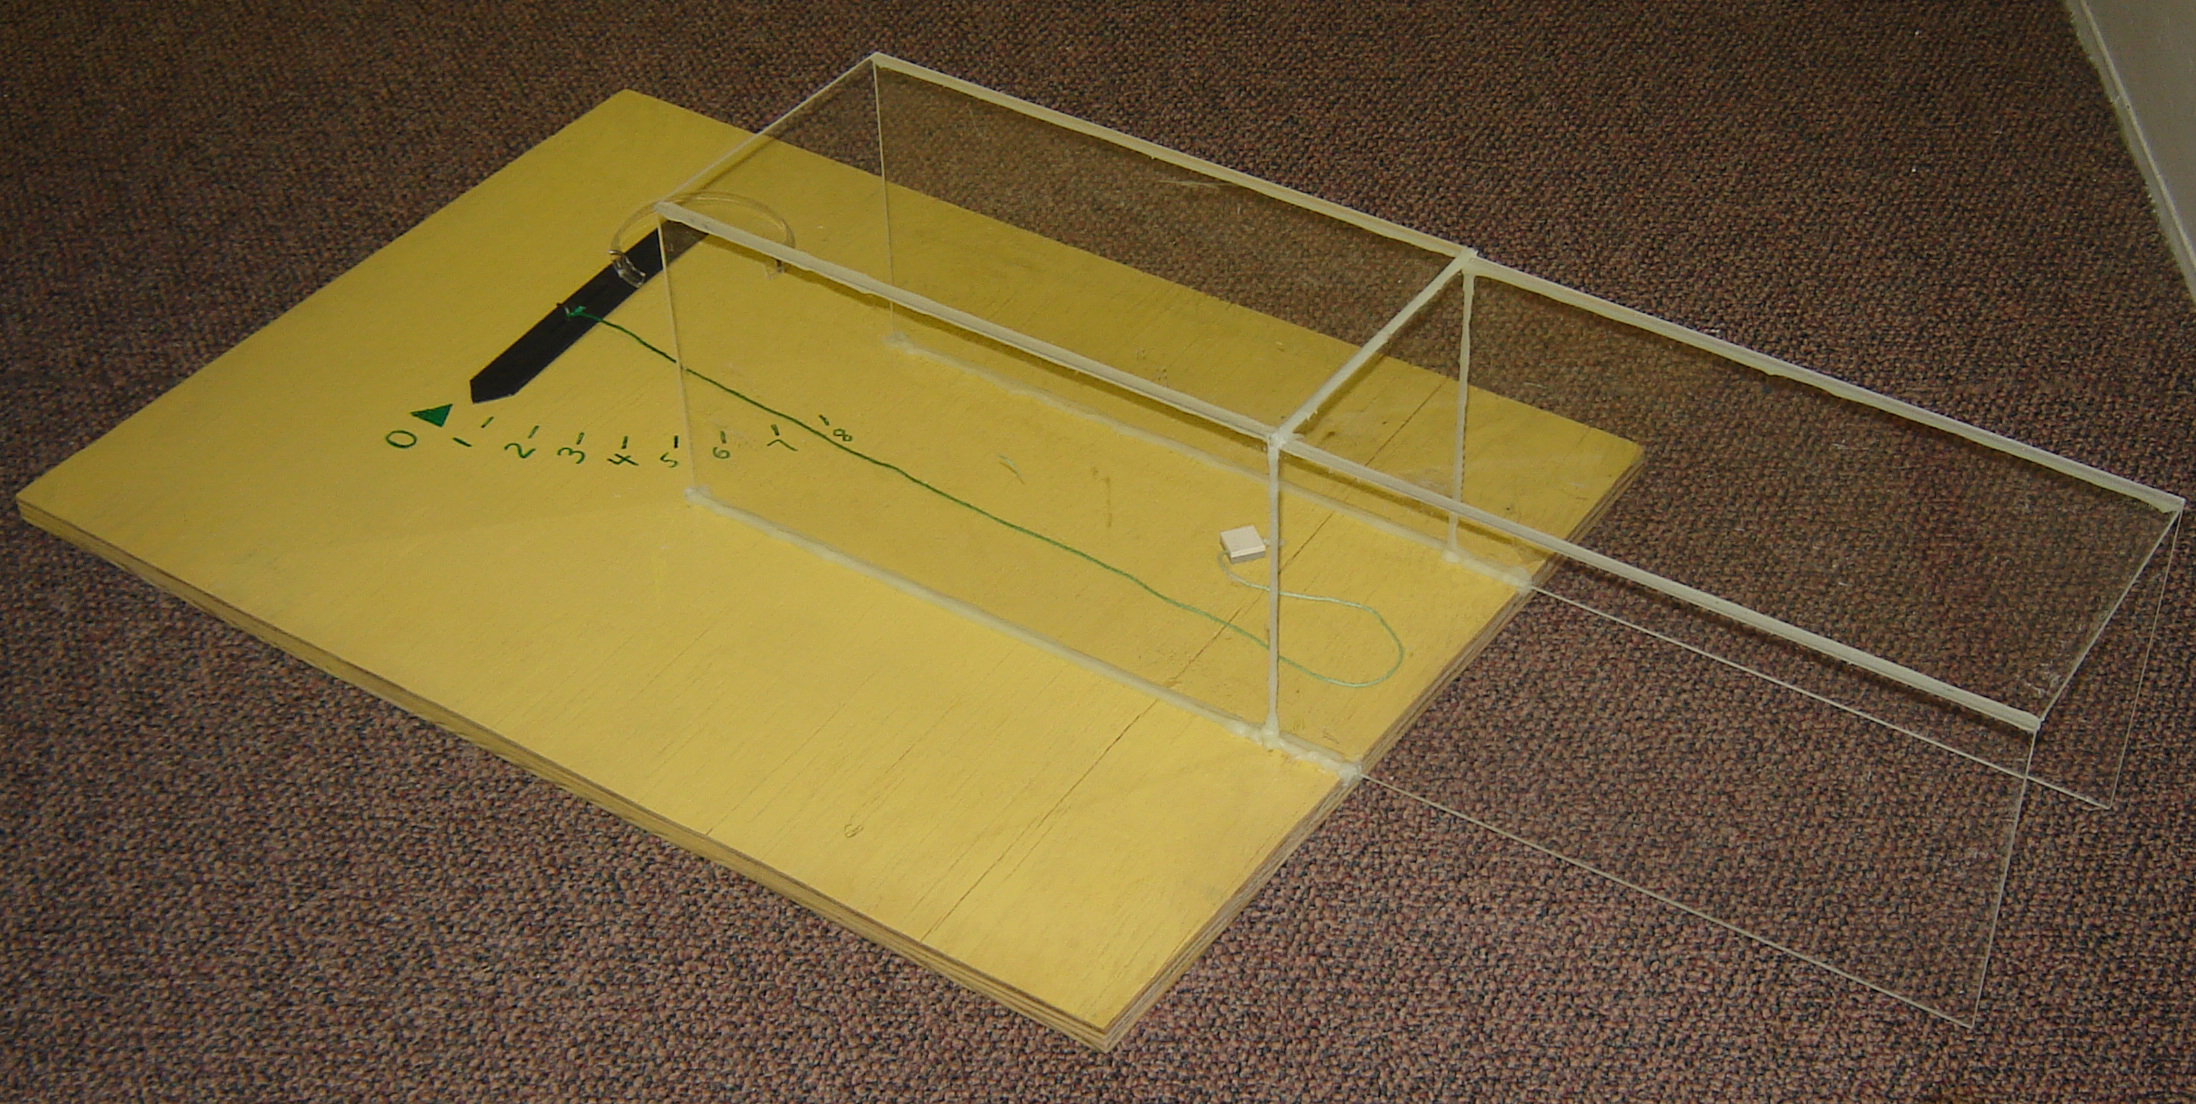
What We Made
A leaf blower-driven wind tunnel with:
- Acoustically insulated blower motor housing
- Transparent Plexiglas tunnel for the vehicles
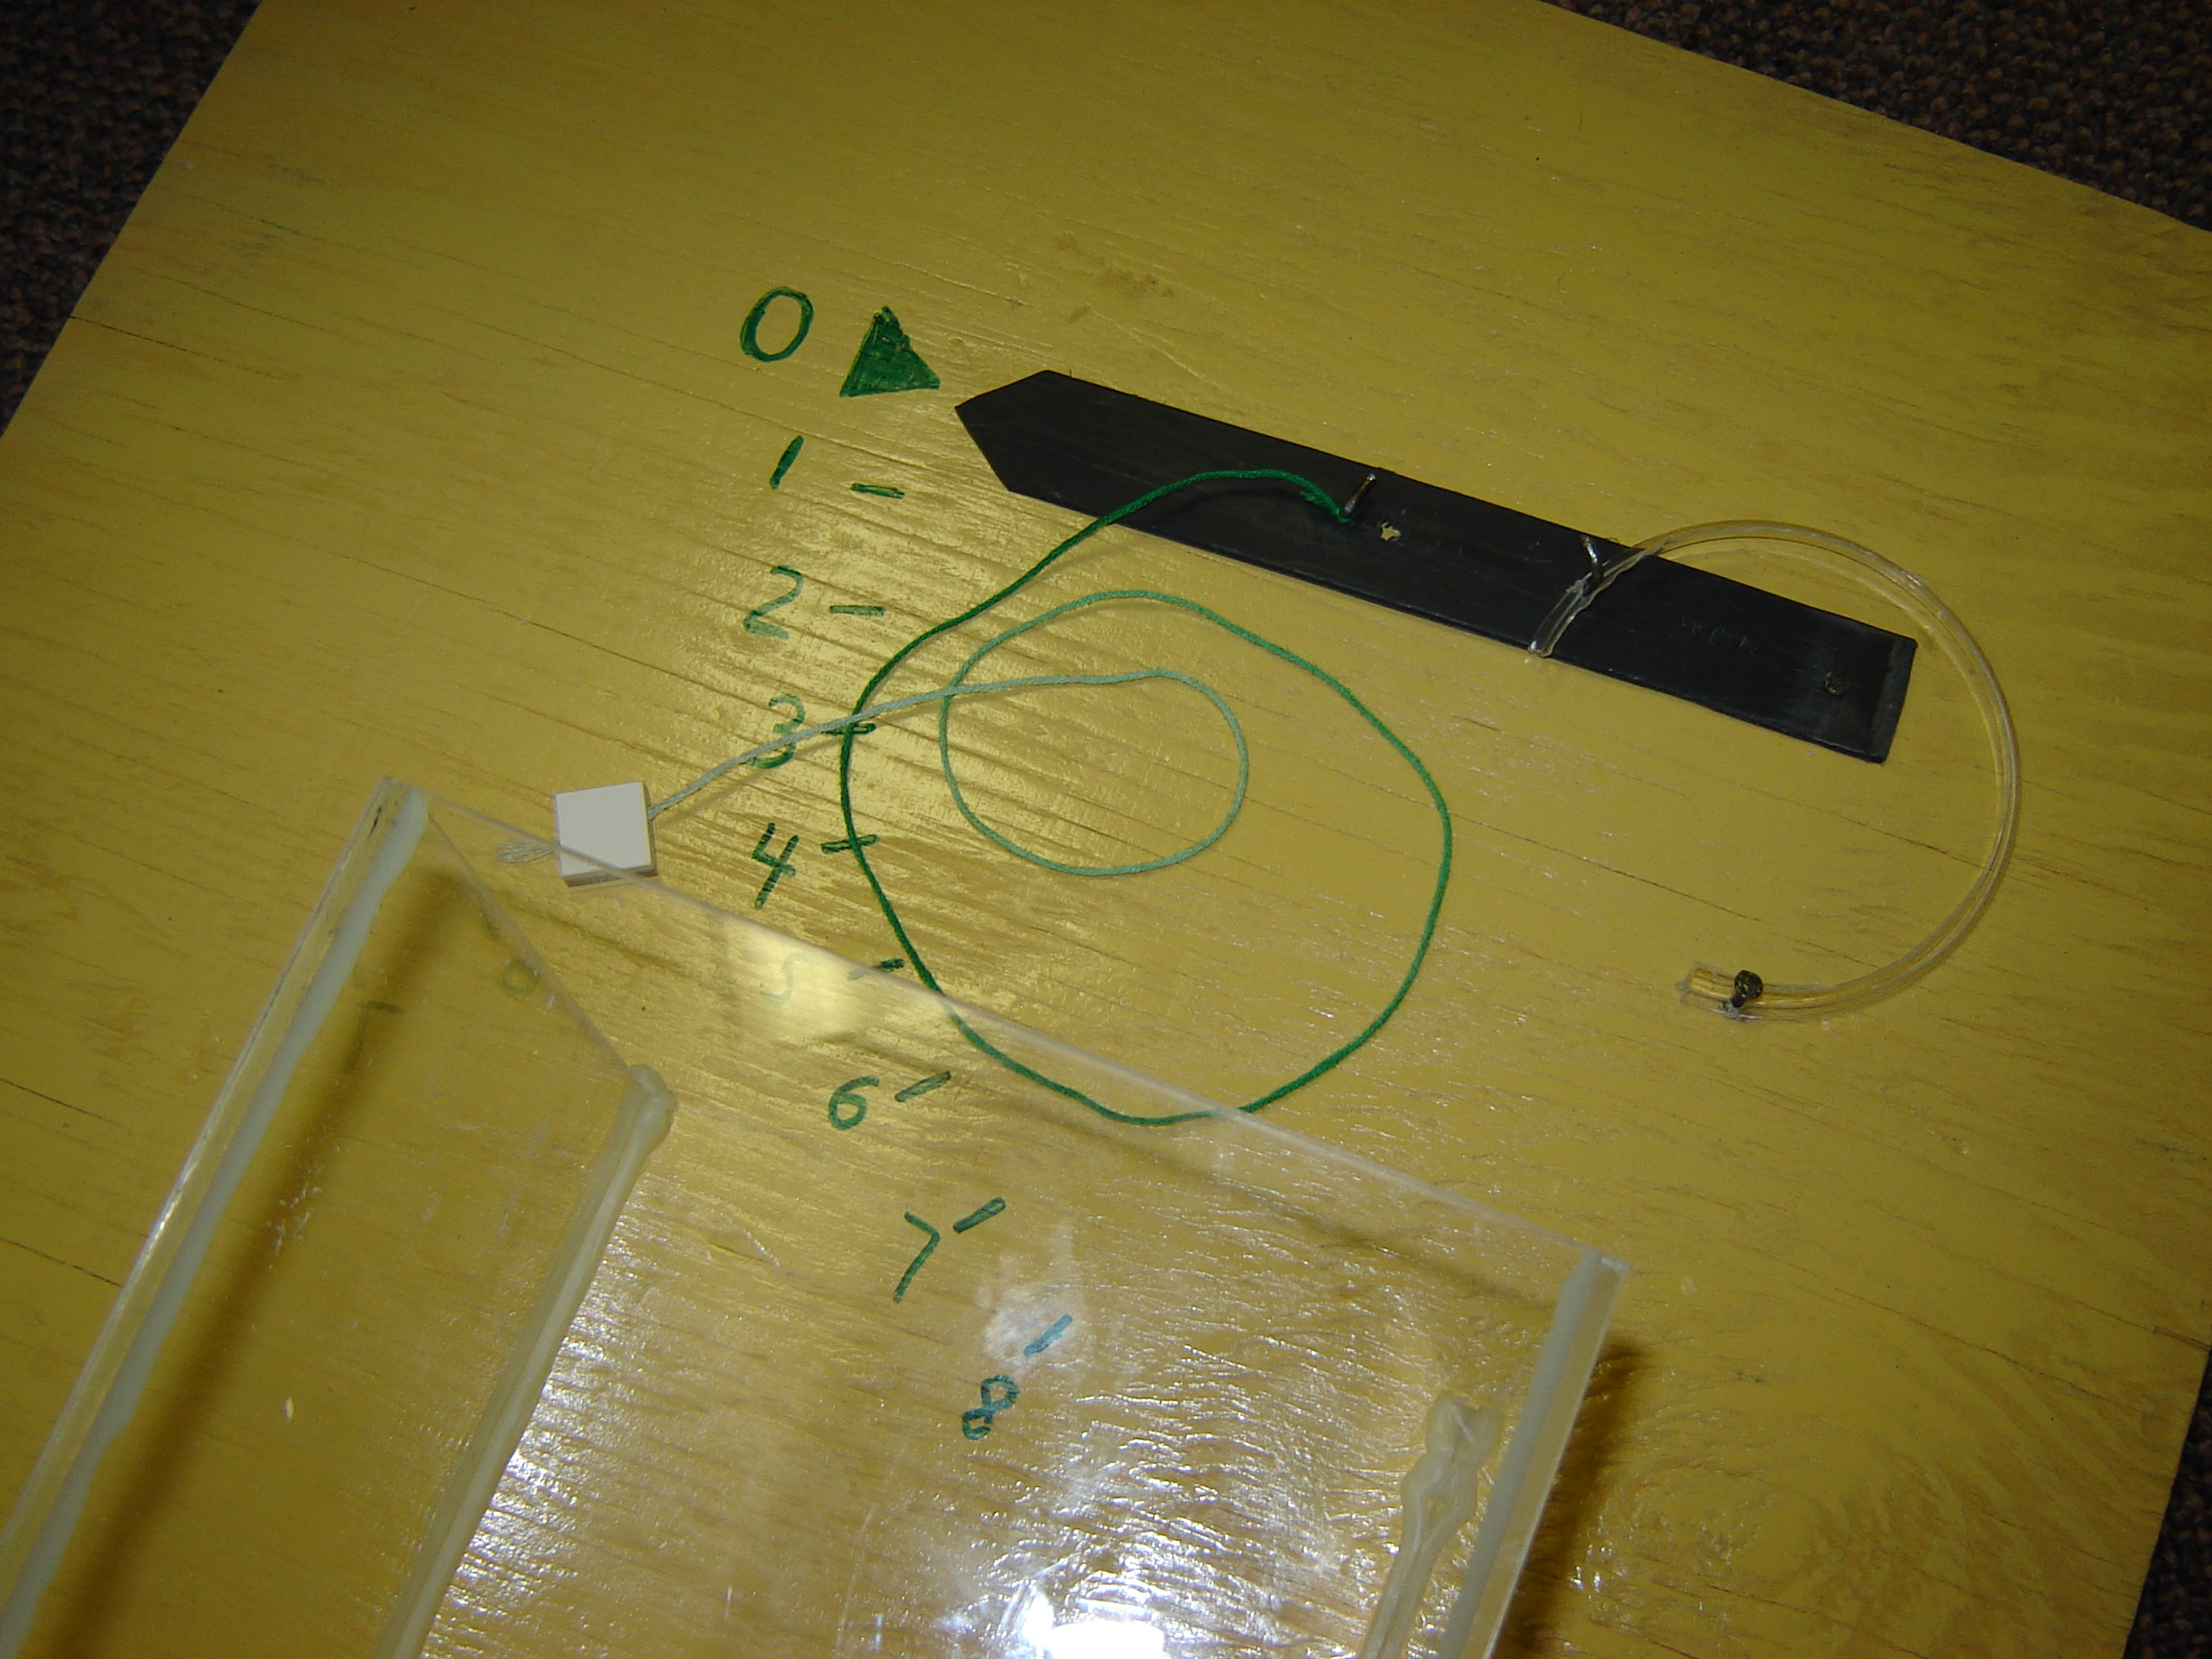
- Meter for measuring relative wind resistance
How We Made It
● We used cardboard, foam, tape, Plexiglas, epoxy, string, a leaf blower, and LEGO bricks
● The Plexiglas tunnel was cut with the help of a laser cutter and assembled using epoxy
● The acoustically insulated motor housing was constructed out of cardboard, tape, and foam
● The meter was constructed using the rim of a plastic drinking cup, and a piece of plastic on a pivot attached to the vehicle with string
Design
● It is usually best to avoid custom-made components when similar things are readily available
- We used Legos rather than manufacturing custom wooden cars with interchangeable parts
● Wind tunnels require fans that operate at high speeds against a significant pressure differences
- We used a leaf blower instead of ordinary non-centrifugal window fans
● Noise Matters – We needed to construct an acoustically-insulated blower housing to reduce noise
Downloads
Instructor's Sheet
Student's Sheet
Vitaly Cherednichenko
Paul Kim
Scott Moorby
Carnegie Mellon University
Rapid Prototyping Design (39-245)
Susan Finger (Advisor)
Section A
Spring 2008