Concept #1
Concept #1: Beakman's Electric Motor
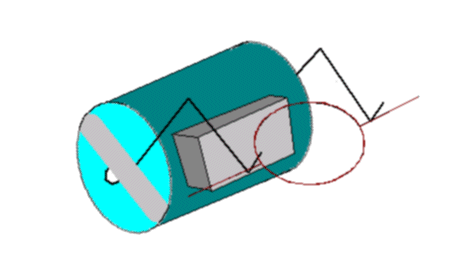
This idea for a simple motor was originally seen on the show Beakman's World and was transcript-ed by Christopher M. Palmer. Although implementation of this idea may be difficult for a discovery box since it necessitates renewable materials, it is a very exciting and simple way for a child to understand an application of Electric Fields. Possible implementations include the diagram as seen bellow. Some of the features include: 1. A Work Surface that encloses how the finished product should look like and operate; 2. Permenant tools which are used for the design; 3. A 'one time only dispenser of the materials pack' which is reset when the box is put back into it's holding cell; 4. A final fixture for the battery so that the child can present his work to friends and family. 
This Discovery Box may also be marketed as a child/parent activity if the motor winding requires to much dexterity for a 12 year old child. This project is also marketed toward both sexes.

Figure: Motor.gif
Materials Required/price:
- One 'D' Cell Alkaline Battery (50c?/could possibly have this permenant)
- One Wide Rubber Band (1c?)
- Two Large Paper Clips (2c?)
- One Rectangular Ceramic Magnet (25c?)
- Heavy Gauge Magnet Wire (the kind with red enamel insulation, not plastic coated) (1c)
- One Toilet Paper Tube (not needed for this application)
- Fine Sandpaper (5c)
- Optional: Glue, Small Block of Wood for Base
Approximate Total (84c)
Instructions:
- Starting about 3 inches from the end of the wire, wrap it 7 times around the toilet paper tube. Remove the tube (you don't need it any more). Cut the wire, leaving a 3 inch tail opposite the original starting point. Wrap the two tails around the coi
l so that the coil is held together and the tw
o tails extend perpendicular to the coil. See illustration below:

Figure 1: M1.gif
Note: Be sure to center the two tails on either side of the coil. Balance is important. You might need to put a drop of glue where the tail meets the coil to prevent slipping.
- On one tail, use fine sandpaper to completely remove the insulation from the wire. Leave about 1/4" of insulation on the end and where the wire meets to coil. On the other tail, lay the coil down flat and lightly sand off the insulation from the top
half of the wire only. Again, leave 1/4" of full insulation on the end and where the wire meets the coil.

Figure 2: M2.gif
- Bend the two paper clips into the following shape (needle-nosed pliers may be useful here):

Figure 3: M3.gif
- Use the rubber band to hold the loop ends (on the left in the above drawing) to the terminals of the "D" Cell battery:

Figure 4: M4.gif
- Stick the ceramic magnet on the side of the battery as shown:

Figure 5: M5.gif
- Place the coil in the cradle formed by the right ends of the paper clips. You may have to give it a gentle push to get it started, but it should begin to spin rapidly. If it doesn't spin, check to make sure that all of the insulation has been remove
d from the wire ends. If it spins erratically, make sure that the tails on the coil are centered on the sides of the coil. Note that the motor is "in phase" only when it is held horizontally (as shown in the drawing).
- For display, you will probably need to build a small cradle to hold the motor in the proper position. It might also help to bend the ends of the coil a bit so that as it slips right or left, the bends keep it in the proper position:

Figure 6: M6.gif
Further Experiments:
Since this is an existing design, you might want to do some further experiments to make it more of a Science Fair experiment instead of just a model. Here are some suggestions:
- Try to adjust the phase angle of the motor so that it will operate in a vertical position. This involves removing a different area of insulation from the partially bared tail of the coil.
- Try making different shaped coils and seeing how they work. Is the circle the best shape? Try squares, ovals, etc. Make a display showing each of the coils you tried with a short summary of the results underneath them.
- Try varying the number of turns of wire in the coil. I don't know where they came up with seven. Does even or odd number of turns matter? Does the number of turns determine the speed? Again, include the different coils in the display and describe
the results.
- How long can you get the motor to run before it falls off the cradle?
- Turn the coil slowly by hand and feel the magnetic attraction at each position of the coil. Make drawings showing the different coil positions and describe how the attractions vary at each position.
- HARD ONES: Can you think of an interesting way of determining the speed of the motor (in RPM)? Can you make the motor do any work?
Problems that may arise:
- The parts needed may get stollen
- The cost of the parts may exceed budget
- The dexterity needed may be greater than that of a 12 year old


