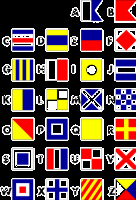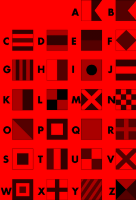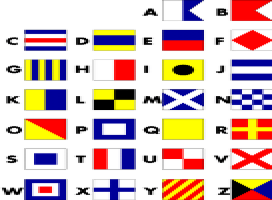

Note: You are responsible for protecting your solutions to these problems from being seen by other students either physically (e.g., by looking over your shoulder) or electronically. (More information can be found in the instructions for Programming Assignment 2.)
For each problem, your job is to write a function that takes an image represented in this format, and returns a new image of the same size that has something about the image changed.
To test your functions, you will need to download ppm.rb and some images in the ppm format, such as nautical.ppm, scottiedog.ppm, and tcortina.ppm into your pa9 directory. Once you do that, you should do the following in irb (replacing remove_red!(m) with a call to your function):
>> load("ppm.rb")
=> true
>> b = load_ppm("nautical.ppm")
=> [[[255, 255, 255], [255, 255, 255] ...
>> remove_red!(b)
=> nil
>> plot(b)
=> nil
 |
becomes |  |
Unfortunately, if you are accessing unix.andrew.cmu.edu, the plot function may take several minutes to send the data to your local window. An alternative that will go faster is to save your modified image, and then view it using the command line program display.
To use display to view your modified image (m from the example above), first save your modified image to a ppm file using the function save_ppm:
>> save_ppm(m, "redless_nautical.ppm")
=> nil
Then in a separate window, establish an ssh session (with X11 forwarding), and in your pa9 directory, run the command:
[andrewid@unix37 pa9]$ display redless_nautical.ppm
Note: you may also be able to improve performance slightly by telling ssh to use compression. If you are using the command-line ssh (e.g., on a Mac), you can use the "-C" switch:
ssh -CX andrewid@unix.andrew.cmu.edu
The ppm.rb functions require images in the ppm format. If you want new images to test, unix.andrew.cmu.edu has programs that can be used to convert more common image formats (including JPEG, PNG, and GIF to PPM). These can be used as follows:
jpegtopnm file.jpg > file.ppm
giftopnm file.gif > file.ppm
pngtopnm file.png > file.ppm
Each of these example commands will create a PPM file called file.ppm from file.jpg, file.gif, or file.png, respectively.
[1 points] Write a Ruby function green_filter!(image) (in the file green_filter.rb) that requires an image array (as defined above) as its parameter and modifies it so that it has only the green components of the original image.
Here is an algorithm you can follow. (It is very similar to the one for remove_red.) Make sure you understand how this algorithm works. Don't just translate it to Ruby without thinking about it.
Set num_rows equal to the number of rows in the image.
Set num_columns equal to the number of columns in the image.
For each row in the image do the following:
For each column in the image do the following:
Set red to the red component of the pixel array at the current row and column in the image.
Set green to the green component of the pixel array at the current row and column in the image.
Set blue to the blue component of the pixel array at the current row and column in the image.
Store the pixel array [0, green, 0] at the current row and column in the image.
Return nil.
Sample usage:
>> b = load_ppm("nautical.ppm")
=> [[[255, 255, 255], [255, 255, 255] ...
>> green_filter!(b)
=> nil
>> plot(b)
=> nil
 |
becomes |  |
[2 points] Write a Ruby function black_to_white!(image) (in the file black_to_white.rb) that requires an image array (as defined above) as its parameter and alters that image by changing each black pixel into a white pixel and each white pixel into a black pixel. Your function will look very much like the one above, except that the computation done inside the column loop will be different.
Basic idea: For each pixel, if it represents black, change its red, green, and blue components so it will represent white instead. Otherwise if it represents white, change its red, green, and blue components so it will represent black instead.
Sample usage:
>> b = load_ppm("nautical.ppm")
=> [[[255, 255, 255], [255, 255, 255] ...
>> black_to_white!(b)
=> nil
>> plot(b)
=> nil
 |
becomes |  |
[2 points] Write a Ruby function red_scale!(image) (in the file red_scale.rb) that requires an image array (as defined above) as its parameter and converts that image to an image consisting only of pixels that are various brightnesses of red. To convert each pixel to "red scale," get the pixel's red, green and blue values and then create a new pixel that contains the average of these 3 values as its red component. For example, if the pixel is [50, 100, 91], then its red scale version is [80, 0, 0].
Algorithm: For each row and column, store the red, green and blue values of the pixel array for the current row and column and then replace the pixel array at the current row and column with its "red scale" version as defined above.
Sample usage:
>> b = load_ppm("nautical.ppm")
=> [[[255, 255, 255], [255, 255, 255] ...
>> red_scale!(b)
=> nil
>> plot(b)
=> nil
 |
becomes |  |
[2 points] (HARDER) Write a Ruby function widen!(image) (in the file widen.rb) that requires an image array (as defined above) as its parameter and converts it into [correction] the same image streched horizontally so that each pixel in the original image is two pixels in the widened image. See sample image below for an example. You will have to figure out the algorithm for this problem!
Sample usage:
>> b = load_ppm("nautical.ppm")
=> [[[255, 255, 255], [255, 255, 255] ...
>> widen!(b)
=> nil
>> plot(b)
=> nil
[corrected function call]
 |
becomes |  |

For part II of this assignment, you will work on a module in the Online Learning Initiative at CMU that will teach you about encryption. This module will help you learn the basics about encryption before we cover this topic in class. The module is designed so we can focus in class on the parts of the topic that you find more difficult, which in turn will hopefully maximize your learning for this topic.
In order to get credit for this part, you must complete the module by the deadline for the programming part. We will not be grading you on how many questions you get right in the module. Instead, we will be grading you on whether you completed the module on time or not.
To access the Encryption module:
Go to this URL: https://oli.web.cmu.edu/.
Click the Sign In link in the upper right corner.
Enter the course key cs4hs2012 into the box labeled "Course Key:" in the shaded section titled "Register". and then click the REGISTER button.
At the Sign In page, be sure to click on the "Carnegie Mellon / CMU users sign in here" link to the right of the "Sign In" heading. Authenticate using your Andrew ID and password.
You should see a page that says "My Courses". Look for Principles of Computing - 15110m13 Cortina and click the link Enter Course underneath this heading.
Click the link for Module 2: Encryption to begin the online lesson.
You should have a pa9 directory, containing:
Zip up your directory and upload it using the autolab system.