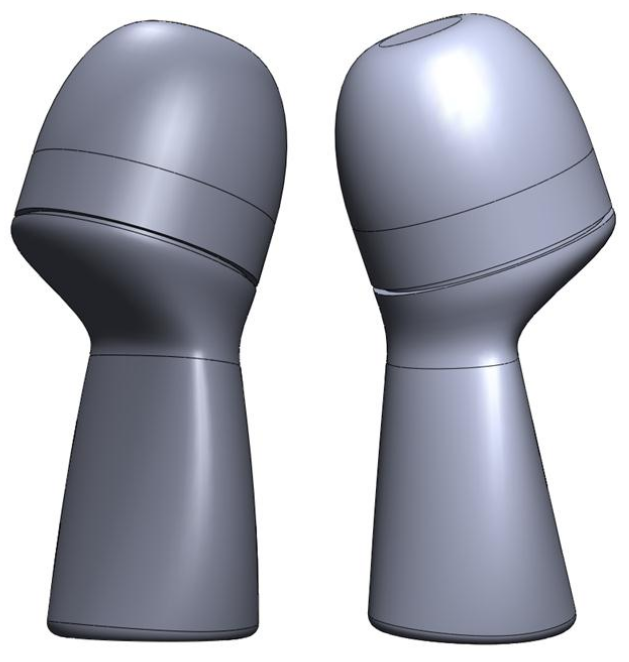
Surfaces
This exercise is reproduced from Jan-Willem Zuyderduyn's
"How
to Model A Deodorant Roller in SolidWorks?" tutorial from
LearnSolidWorks.com.

Reference Images
- Make a Deodorant folder and download the files frontview_deoroller.jpg and
sideview_deoroller.jpg to that folder.
- Start SolidWorks.
- Make a new part.
- Set the units to millimeters.
- Make a new sketch on the Right plane.
- Go to Tools > Sketch Tools > Sketch Picture and insert the sideview_deoroller.jpg image. Choose Low Resolution.
- Set the picture properties as follows:
- Turn off Enable Scale Tool.
- Turn on Lock Aspect Ratio.
- x origin -55.00 mm
- y origin -22.00 mm
- leave the angle at 0 deg
- x size 106.50 mm
- y size will self-adjust
- transprency: "Full Image", set to 0.40
- Click OK.
- Close the sketch.
- Make new sketch on the Front plane.
- Go to Tools > Sketch Tools > Sketch Picture and insert the frontview_deoroller.jpg image. Choose Low Resolution.
- Set the picture properties as follows:
- Turn off Enable Scale Tool.
- Turn on Lock Aspect Ratio.
- x origin -53.00 mm
- y origin -22.00 mm
- leave the angle at 0 deg
- x size 106.50 mm
- y size will self-adjust
- transprency: "Full Image", set to 0.40
- Click OK.
- Close the sketch.
- Save your part as "Deodorant.SLDPRT".

Cap
- Make a new sketch on the Right plane.
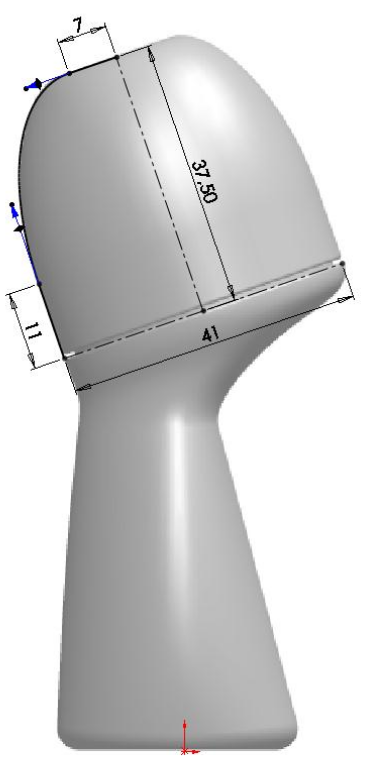
- Add two centerlines as shown.
- Add two line segments, and connect them with a spline without any midpoints.
- Add tangent relations between the spline and the line segments.
- Adjust the spline to match the reference image. You will only be able to change the lengths of the arrows, not the angles, due to the tangent relations.
- Close the sketch.
- Make sure the Surface tab is visible. If not, right click on any tab, go to Tabs, and select Surface.
- Select the sketch, then create a Revolved Surface feature from
the sketch.
- Save your part.

Body
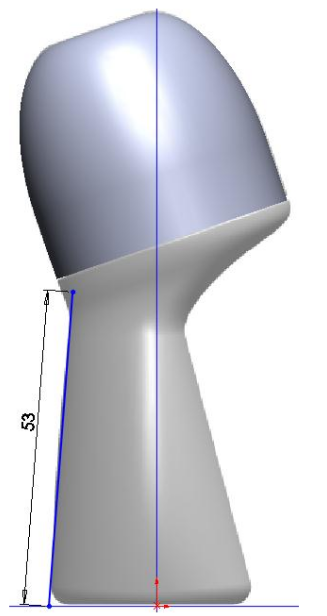
- Create a new sketch on the Right plane.
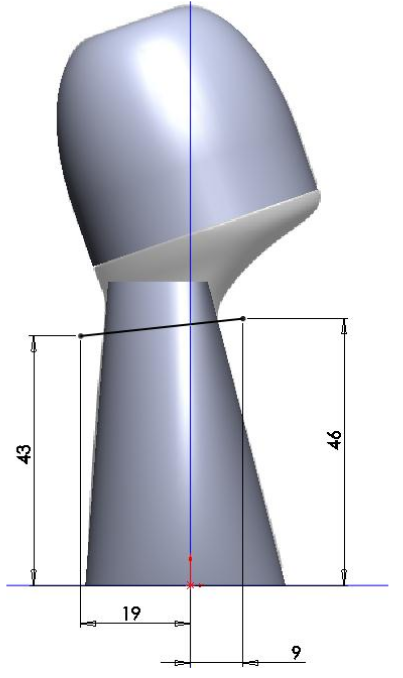
- Draw the 53 mm line as shown. The bottom point should be horizontal to the origin.
- Close the sketch.
- Rename the sketch to GUIDELINE_FRONT.

- Create another sketch on the Right plane.
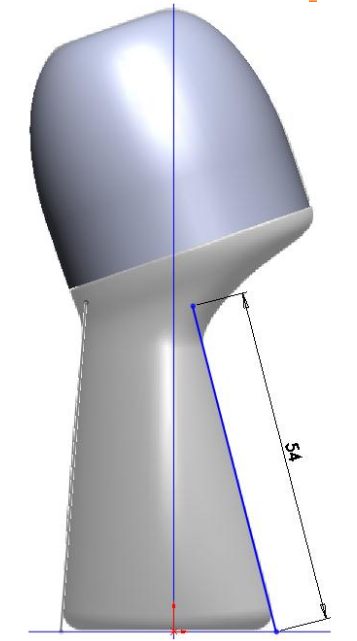
- Draw the 54 mm line as shown. The bottom point should be horizontal to the origin.
- Close the sketch.
- Rename the sketch to GUIDELINE_BACK.

- Create a new sketch on the Front plane.
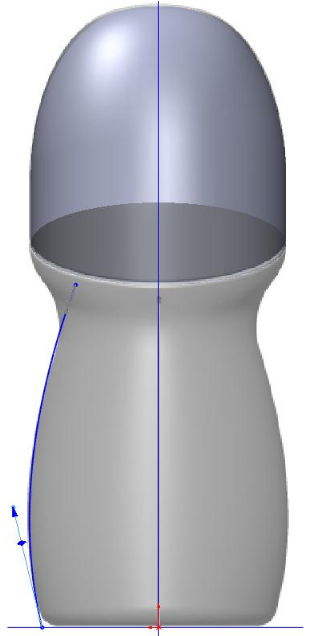
- Draw a spline without midpoints as shown. The bottom point should be horizontal to the origin.
- Change the arrows to approximate the outline of the body.
- Close the sketch.
- Rename the sketch to GUIDELINE_SIDE.

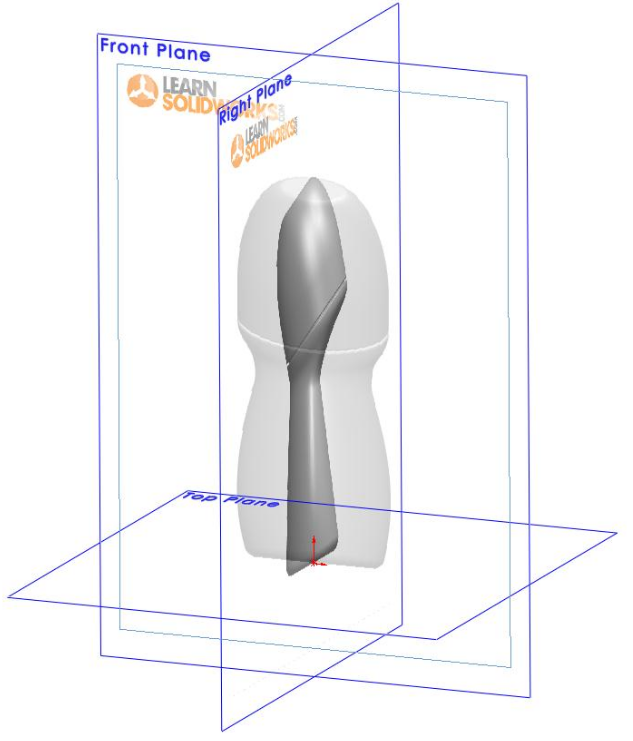
- Create a new sketch on the Top plane.
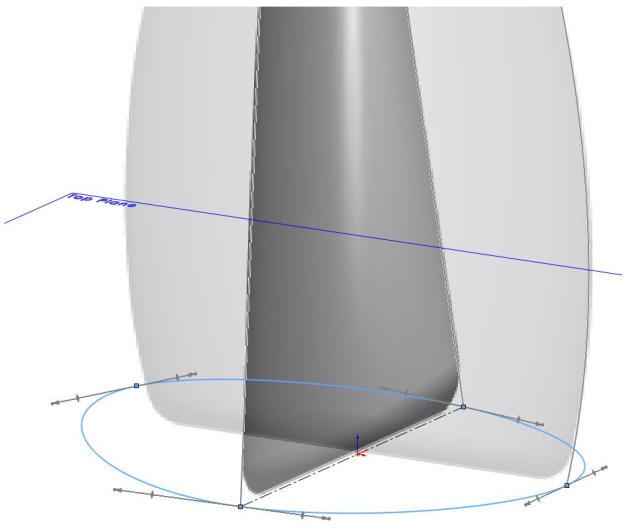
- Draw a centerline connecting the front and back guidelines.
- Draw a closed oval spline with four points, three of which intersect the guidelines.
- Select the spline point not on a guideline, shift-click on the
centerline, then shift-click on the opposite point (on the side
guideline). Add a Symmetric relation.
- Close the sketch.
- Rename the sketch to PROFILE.

- Create a new sketch on the Right Plane.
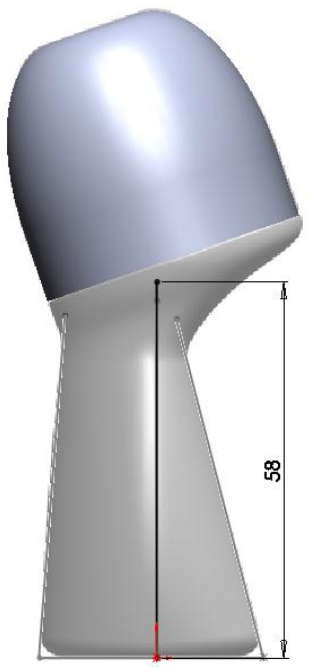
- Draw a 58 mm line up from the origin.
- Note: this must be a solid line, not a construction line.
- Close the sketch.
- Rename the sketch to PATH.

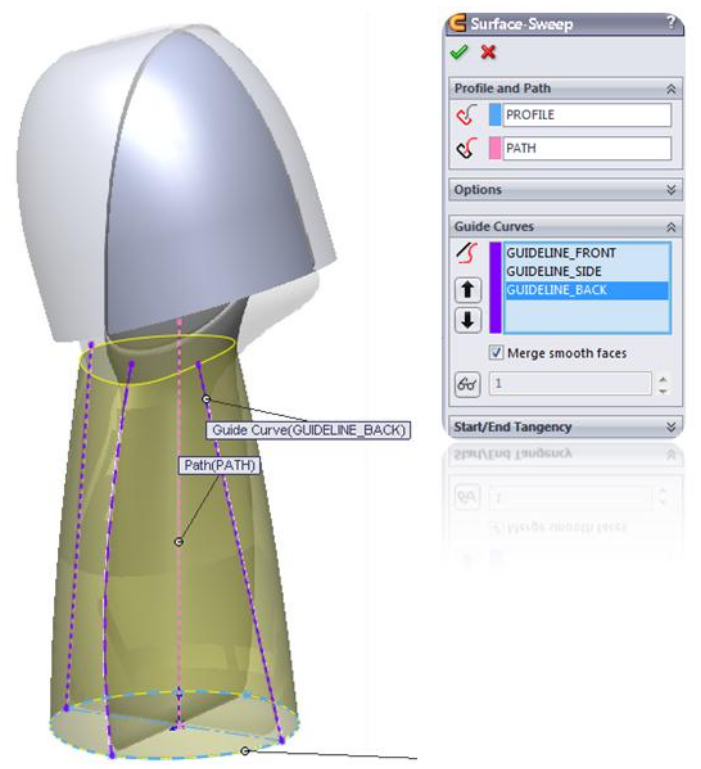
- Create a Swept Surface feature.
- Select the PROFILE sketch as the Sweep Profile.
- Select the PATH sketch as the Sweep Path.
- Select the three GUIDELINE sketches as the guidelines curves.
- Click OK.
- Save your part.

Trim the Top of the Body
- Create a new sketch on the Right plane.
- Draw the cut line as shown.
- Close the sketch.
- In the Surface tab, select Trim Surface.
- Set the trim type to Standard.
- For the Trim Tool, select the sketch you just made.
- Choose Remove Selections.
- Set the Surface Split Options to Natural.
- Hover on the part of the body above the trim line; it should glow orange. Click
on it to select it and it will turn purple.
- Click OK.

Create the Neck
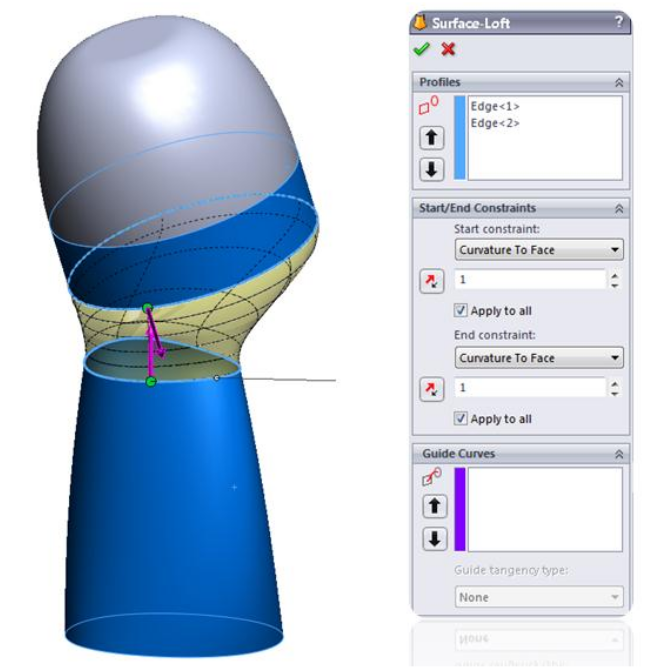
- Create a Lofted Surface feature.
- In the Profiles box, select the bottom edge of the cap and the top edge of the body.
- Make sure the green balls are aligned.
- Click on the Start/End Constraints box.
- Set both constraints to Curvature to Face.
- Change the length of the purple arrows to adjust the shape of
the loft. Adjust it to match the profile in the image.
- Click OK.
- Turn off visibility of the sketches with the images.
- Save your part.

Fill the Bottom
- Create a Filled Surface feature.
- Click on the bottom edge of the body.
- Click OK.
Knit the Surfaces and Create a Solid Body
- Create a Knit Surface feature.
- Select the cap, neck, body, and bottom surfaces.
- Turn on Create Solid.
- Turn on Merge Entities.
- Turn off Gap Control.
- Click OK.
- Fillet the bottom edge of the body with a radius of 2 mm.
- Save your part.
Cut the Cap Gap
- In the Features Tab, open Reference Geometry and create an Axis.
- Select the Cylindrical/Conical Face option.
- Click on the cylindrical (bottom) segment of the cap, not the top segment.
- Click OK.
- Create a new sketch on the Right plane.
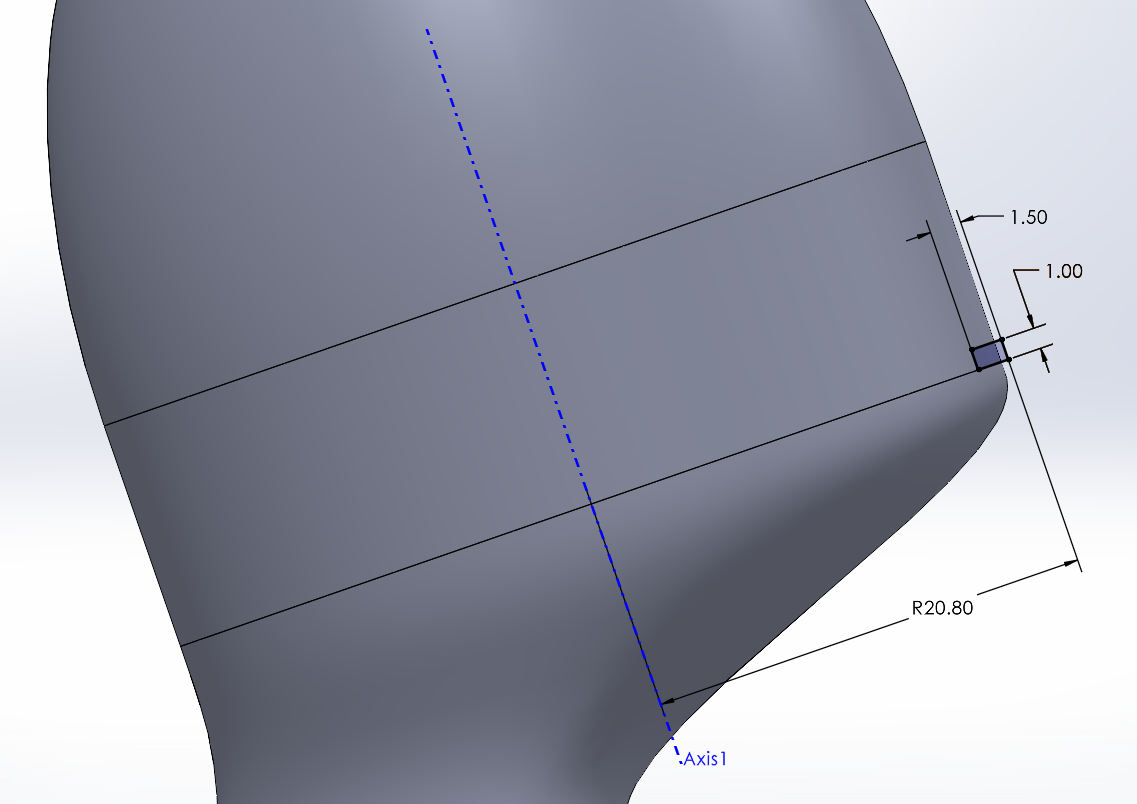
- Using a three-corner rectangle tool, draw the rectangular
cutting profile shown. The first two points should be snapped to
the bottom edge of the cap. Or you can make the left edge of the rectangle parallel to the symmetry Axis you created.
- Dimension the rectangle to 1.5 mm wide and 1.0 mm high.
- To ensure that the right edge of the rectangle extends far
enough past the end of the neck surface, dimension the distance
from the right edge to the central Axis to be 20.8 mm.

- Close the sketch.
- Select the sketch, then create a Revolved Cut feature using the sketch and the axis.

- Save the file as Deodorant.SLDPRT.
Color Your Part and Add Text.
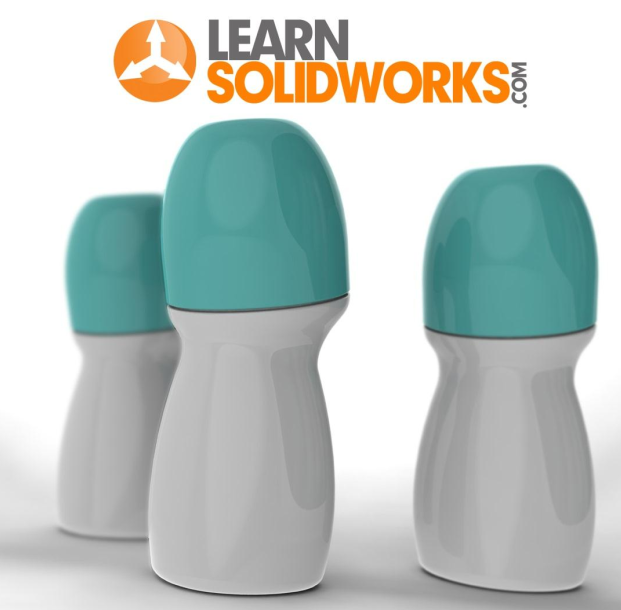
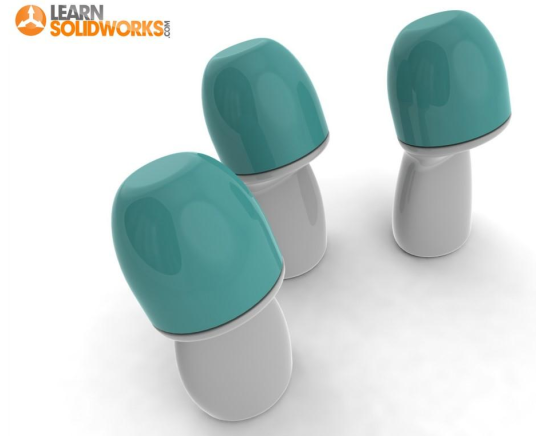
- Color the cap turquise and the rest of the part white.
- Make a new sketch on the Front Plane.
- Insert a text object with the label you want to give your deodorant roller, e.g., "No-Stink".
- Turn off "Use system font" and adjust the font size and font properties to your liking.
- Complete the sketch.
- Insert a Wrap feature by typing "Wrap" in the search box in the top right corner.
- Set the method to "emboss" and the wrap algorithm to "spline".
- Choose the sketch you created, and select the body of the deodorant roller as the wrap surface.
- You may need to check the "Reverse Direction" box if it's embossing the wrong side of the body.
- Color the Wrap feature.
- Save your part.
- Make a rendering of your part: go to SolidWorks Add-Ins and enable Photo 360.
- Go to the Render Tools tab.
- Click on Integrated Preview. Ignore any Windows Defender warnings.

|
