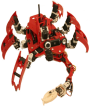
Learning Goal: This lab will familiarize you with the Calliope
robot and the Tekkotsu user interface, called the ControllerGUI.
Part I: Account Setup
You will only have to do this once.
- Log in to a lab workstation using your Andrew userid and password.
- Open a gnome-terminal by typing alt-control-T, or by going to
the pulldown menu at the top of the screen and selecting Applications
> Accessories > Terminal.
- Run the setup script by typing this command in your terminal window:
> /afs/cs/academic/class/15494-s14/utils/setup-account
- In your gnome-terminal, select Edit and then Profile Preferences.
Click on Scrolling and select unlimited scrollback. Then click the
Close button to save your change.
- Log out and log back in again.
Part II: Calliope Familiarization and Powerup
Take a minute to look over your robot. With the power off, it's safe
to gently move the head and arm.
Familiarize yourself with the layout of the robot, including the
locations of switches and power jacks. Read the web page on Create
Controls and Indicators. Then follow these steps to power up your
Calliope:
- Make sure the netbook is powered up. If not, turn it on and it will
boot in about a minute.
- Unplug the charger from the Create. Then press the power button
on the Create to power it up. The power LED will flash several times
and the Create will make a short beep to indicate that it has powered
up successfully.
- Make sure the a/c power adaptor is
plugged into the Calliope5KP's external power jack. Then flip the toggle
switch to "Ext/Chg". This connects the Calliope to external power.
(Flipping the switch to the "Battery" position would run the Calliope
on battery power.) The system power light next to the external power
jack should come on.
- Connect to the robot from your workstation via ssh, with userid
"user". If you're using robot #1, to connect via the Ethernet,
type "ssh user@calliope1.rel".
- Start a ControllerGUI running on your workstation. First, make a new
tab by typing control-shift-T. Then type:
> ControllerGUI calliope1.rel
- To start Tekkotsu running on the Calliope, type this in the shell
on the robot (red prompt):
> cd ~/project

> ./tekkotsu-CALLIOPE5KP
When Tekkotsu has completed its initialization and is ready to accept
commands, you'll also notice that the ControllerGUI window comes alive
and displays a command menu.
- In the ControllerGUI menu, go to File Access > Play Sound.
Note: you must double click quicky on a menu entry to select
it. If you have trouble doing this, then just click once and then hit
[Enter].
- Click on a sound file name, then hit [Enter] to play the sound.
Use the Back button to return to the Root Control menu.
- Click on the Raw button to display the current camera image.
Click on the button again to close the window.
- Click on the Seg button to dislpay the color segmented camera
image. Try holding some bright red, blue, or green objects up to the
camera.
- On a Calliope5KP, click on the Depth button to display the depth
map image.
- If you're using a robot with a movable head, make sure you are
back at the Root Control menu, then click on the "H" button (in the
Teleop row) to launch the Head Remote Control. This will allow you to
move the head around. (You should always be at the Root Control menu
when launching any of the other monitoring tools because of a known
bug that is too obscure to explain here.) Click on the "H" button
again to make the Head Remote Control go away.
Part III: Walking the Dog
This will give you a chance to take the Calliope for a walk.
For safety, position the robot so it's not too close to the edge of the table.
In the ControllerGUI, click on the "W" button in the Teleop row to
launch the Walk Remote Control. Take the robot for a
short walk on the table. Don't run into anything!
Part IV: Sensor Observer
-
Read the Create
sensors page at the Tekkotsu wiki.
-
Go to the Sensor Observer exercise in the Teleoperation
Lab on the Tekkotsu wiki and do steps 1-3 .
Part V: Powering Down
- Stop Tekkotsu by typing control-D or "quit" in the terminal window.
- Press the power button on the Create and the LEDs should all go out.
- On a Calliope5KP, move the toggle switch back to the neutral position, shutting
off robot power and extinguishing the system power light.
- You can leave the netbook powered up; make sure it is plugged in
to its charger, then close the lid.
Part VI: Charging the Batteries
Always plug in the Create's charger when you're done. In addition, if
you've run a Calliope5KP on battery power, you should recharge its
internal battery when you're done:
- Plug in the Create's charger cable.
- Plug in the netbook's charger cable.
- On Calliope5K: Disconnect the external power plug, plug the
charger cable into the charger jack, set the charger mode switch to
1.8 amps, and flip the toggle switch to "Ext/Chag". The charger's red
light should come on.
- If you're in the lab and you see that a charger has switched from
a red light to a green light, flip the Calliope's toggle switch back
to the neutral position. The battery is fully charged.
Part VII: Troubleshooting
- If you get the error message "CREATE DRIVER: Still attempting to
reconnect to Create...", and you've verified that the Create is
powered up and the serial cable is plugged in at both ends, then run
"fix_usbserial.sh" to fix a problem with the usbserial driver under
Ubuntu.
- For other troubleshooting tips, see the Tekkotsu wiki's Troubleshooting
Guide.
|