We used Samsung Galaxy Camera and Samsung Galaxy Camera II. Some things are slightly different between them.
Quick Summary
Mounting the camera: Use the suction cup construction to fasten the camera on the windshield, at an area that is reached by the windshield wiper, but not obstructing the driver. Power camera with a cigarette-light-to-micro-USB cable.
Running the app:Tap the RoadSensing app, then tap “Start Recording”. When you are done collecting data tap “stop recording” and then “exit”.
Downloading data – 3 options:
Ø Connect the camera to your computer with a USB cable. Download all the data from the directory Computer/EK-GC100/Card/RoadSensing.
Ø Remove the microSD card, insert it into a reader (commonly you need an adapter that you plug into your computer), and download all the data from the directory RoadSensing
Ø Make sure that “Upload to S3” (in Settings) is enabled and camera is connected to Wifi. Data will upload automatically to Amazon Web Services.
.
Initial camera setup
Note: Gmail account, Dropbox, and Amazon Web Services are not necessary for the collection app to work, but they are convenient to share data and documents.
First you need to install the battery and insert the microSD card.
When you first start the camera, it asks you all sorts of setup questions (language, time zone, …)
Optional but useful: Created a Gmail account that will be used as the account for the cameras:
Go to google.com, click on gmail, look for “create account” and create the account. If you are an organization and use many collection systems, it is useful to have the same gmail for all of them.
Optional but useful: Sign up for Dropbox. On one of the home screens there should already be a dropbox icon. Tap on it and sign up. Use name and email from above. (Note: If time and date is not set correctly, Dropbox might not let you sign up, see next section for setting time and date). Now you can use Dropbox to push software and instruction updates to all your collection systems.
Optional but useful: Sign up for an Amazon Web Services account. This is a bit more complicated and it will also cost money. Details are at the very end of this document.
Time and Date
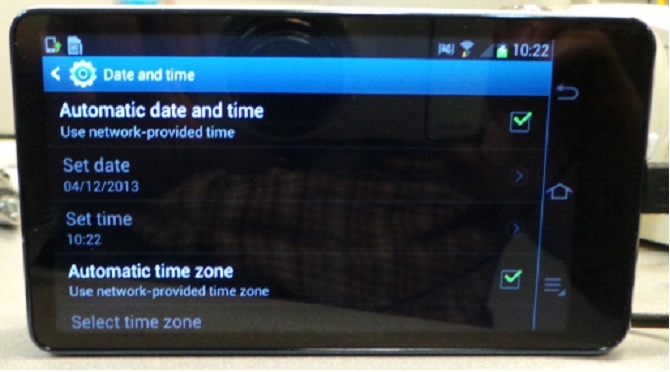
Make sure the camera has the right time and especially correct time zone! Go to “settings”, then “Date and time” to choose the time settings. We have it automatically detect date, time, and time zone. But we also had it happen that the automatic time zone did not work. The time and date is not only important to tag all the runs with the correct time stamp, there are also apps you can’t install or web sites you can’t go to if the date is wrong (e.g. Dropbox).
Installing the App
You can get the app from our website (http://www.cs.cmu.edu/~road/Downloads.html):
RoadSensing-x.y.z.apk – the installation packed for the collection program version x.y.z (as of January 2016 the version is 0.3.2)
After you download it on your Android device, go to the folder that contains it. E.g. tap on the app “My Files” and go to /storage/sdcard0/Download.
When you tap on RoadSensing-x.y.z.apk to install it you will probably get an error message:
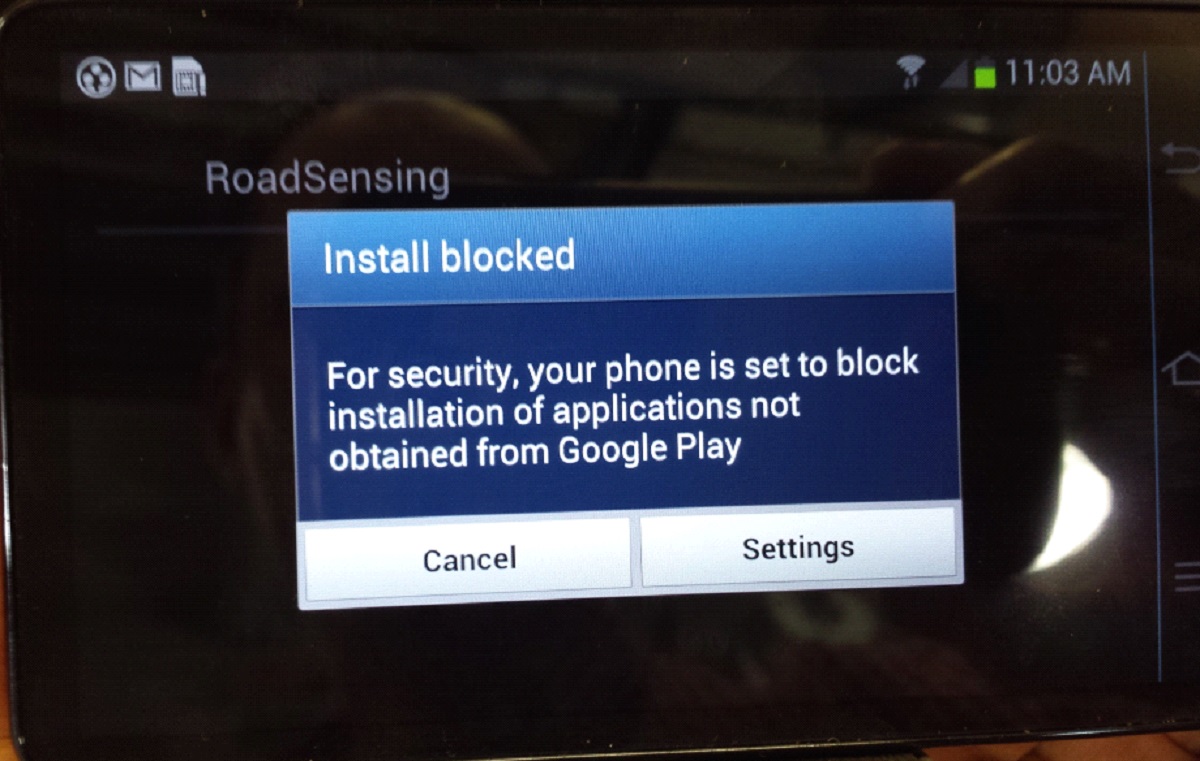
Since this is not an app in Google Play, you need to enable following:
Either tap on “settings” in the above screen or go to the home screen, tap “Setup”, tap “Security”
Go to “Unknown Sources” and check “allow installation of non-Market apps” (or “allow installation of apps from sources other than the Play Store”:
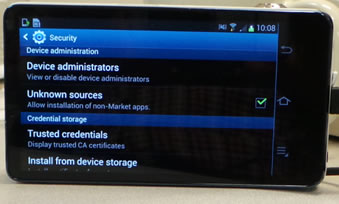
After installation you might want to uncheck this again for security reason.
Tap on RoadSensing-x.y.z.apk and follow the instructions to install it. After installation you can find it by taping “Apps” and looking for it in the set of apps. The name is “RoadSensing” and the icon is a black road.
If you tap an app and keep your finger on it, you can move the icon around. We put the most important icons on the home screen:
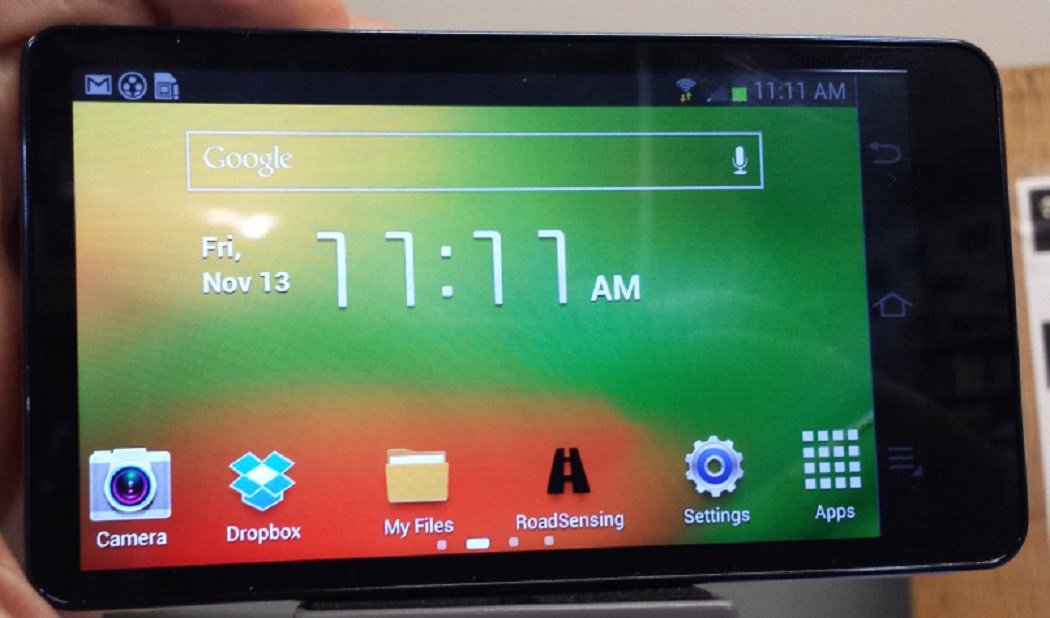
You can see the RoadSensing, My Files, Dropbox, and Settings. Camera and Apps is always there.
Initial App Setup
To do the initial setup of the app tap on it and then on “settings”:
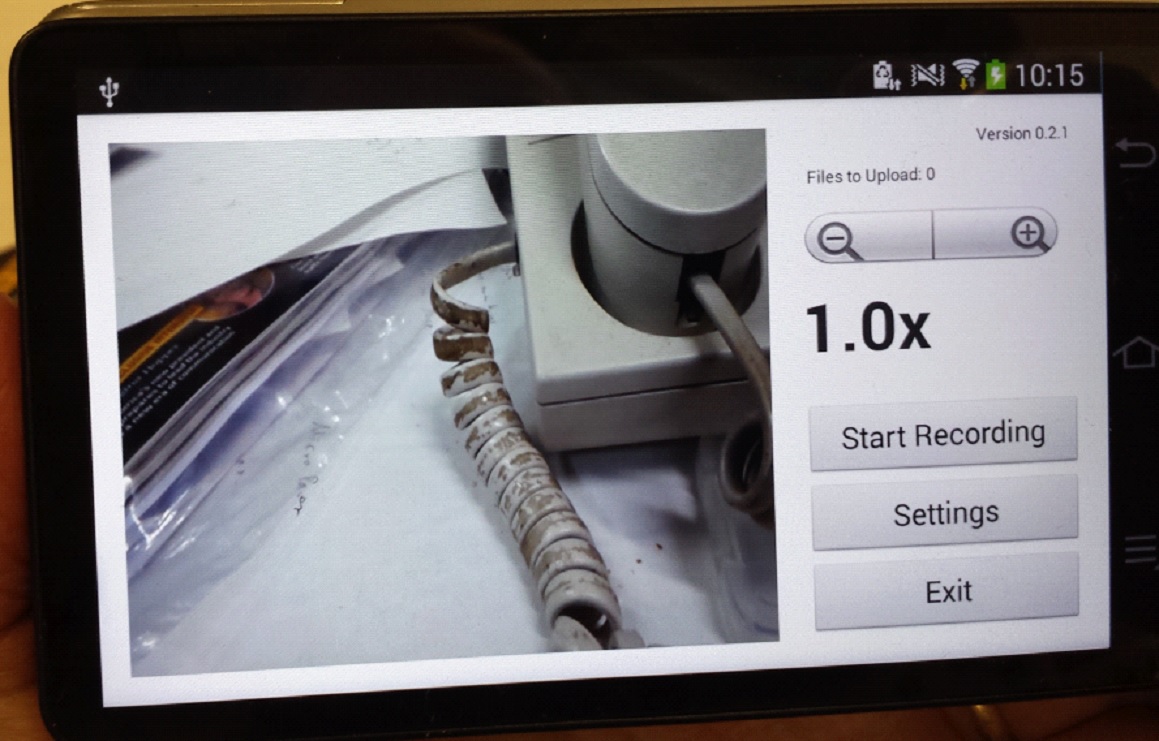
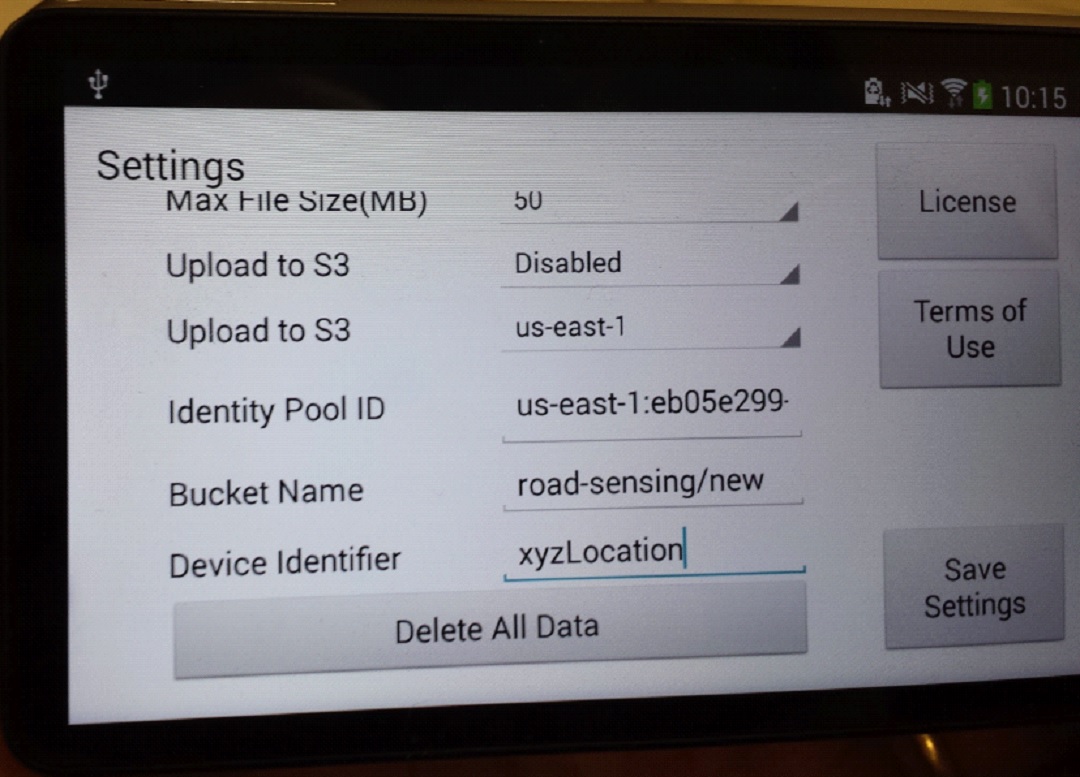
Change the “device identifier” to some useful name. E.g. if you collect data for the city of Pittsburgh and you have 3 vehicles with cameras, call is “pittsburgh1” for one camera “pittsburgh2” for the other, etc.
Optional but useful: If you want to have the data directly uploaded to a AWS server, change the “upload to S3” to “enable” and put in the AWS identity pool ID.
Update App
When you want to update your app to the latest version, you need to first uninstall it and then install the latest version as described above.
To uninstall go to “Settings” and then “Application manager”. Scroll to the RoadSensing app:
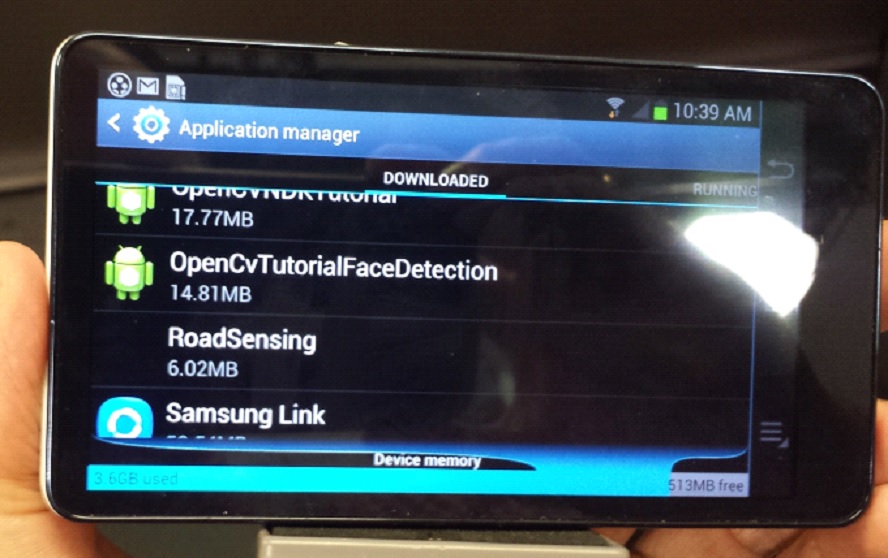
Tap on RoadSensing and then tap on “uninstall”.
After that follow the instruction on installing the app that you can find in the earlier section.
Camera Mount
The mount consists of a suction cup that holds all the equipment, quick release plate for the camera and a black shield:
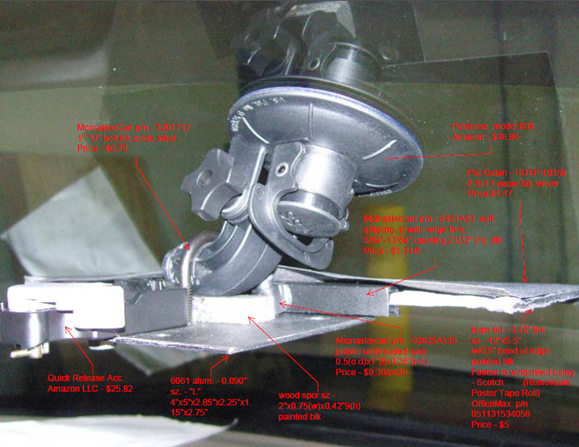
The quick-release is there to easily mount and dismount the camera. Here are the instructions for the quick-release:
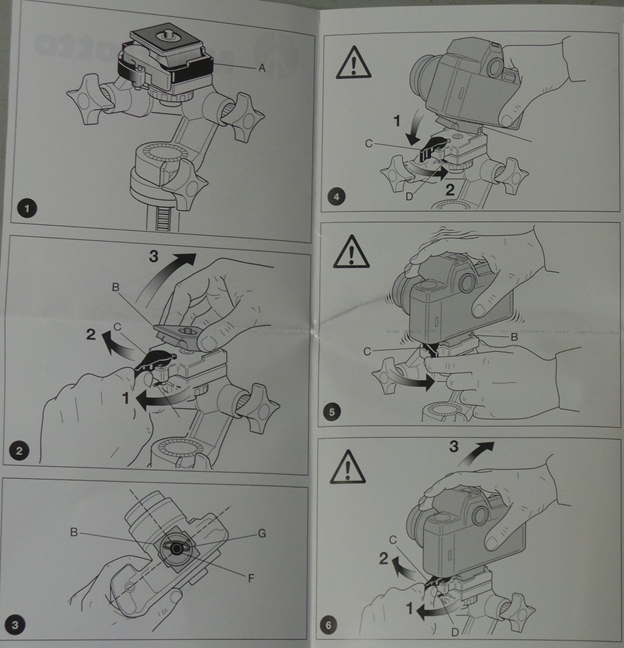
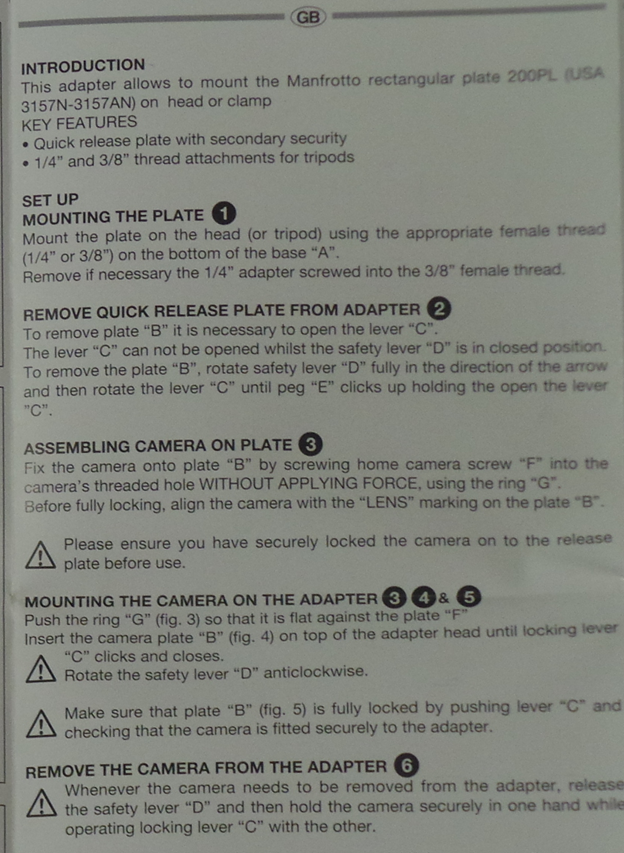
See the instructions on how to build the mount.
The camera is mounted in 5 steps:
Step 1. ) You first must select the camera’s installation location.
The camera must be in an area of the windshield that:
Ø Has a clear view of the roadway and does not obstruct the view of the driver
Ø Is cleaned by the windshield wiper; so the camera has a clear view of the road
Ø Is not near the heating wires are in the windshield, these will obstruct the view
Ø The camera’s USB power cord is able to reach the cigarette lighter outlet
Step 2. ) Attach the camera to the mount by screwing them together. The camera will need to be attached tightly to the mount. A loosely attached camera could compromise the picture integrity by shaking or turning.
(For detailed instruction on how to install/remove the quick release mount, see Appendix A at the end of this document)

Step 3. ) Attach the mount to the selected windshield using the mount’s suction cup.
Step 4. ) Install the black felt drop cloth to the mount
Step 5. ) Plug the camera’s USB power cord in to the cigarette lighter and insure the camera turns on.
Below are images to assist in camera mounting installation:
Below is picture of what the final Camera mount installation on a snow plow should look like: Red Arrow- Suction Cup, Yellow-Quick release, Blue- Black Felt Shield
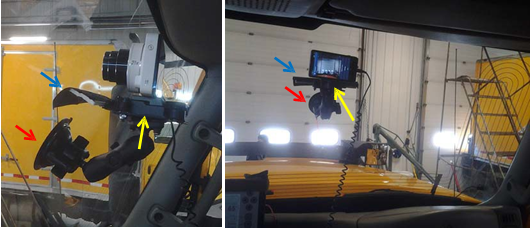
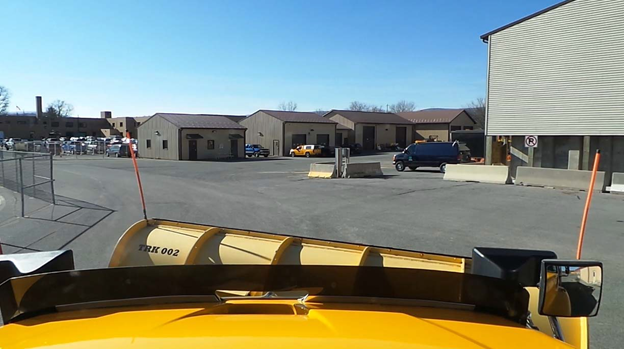
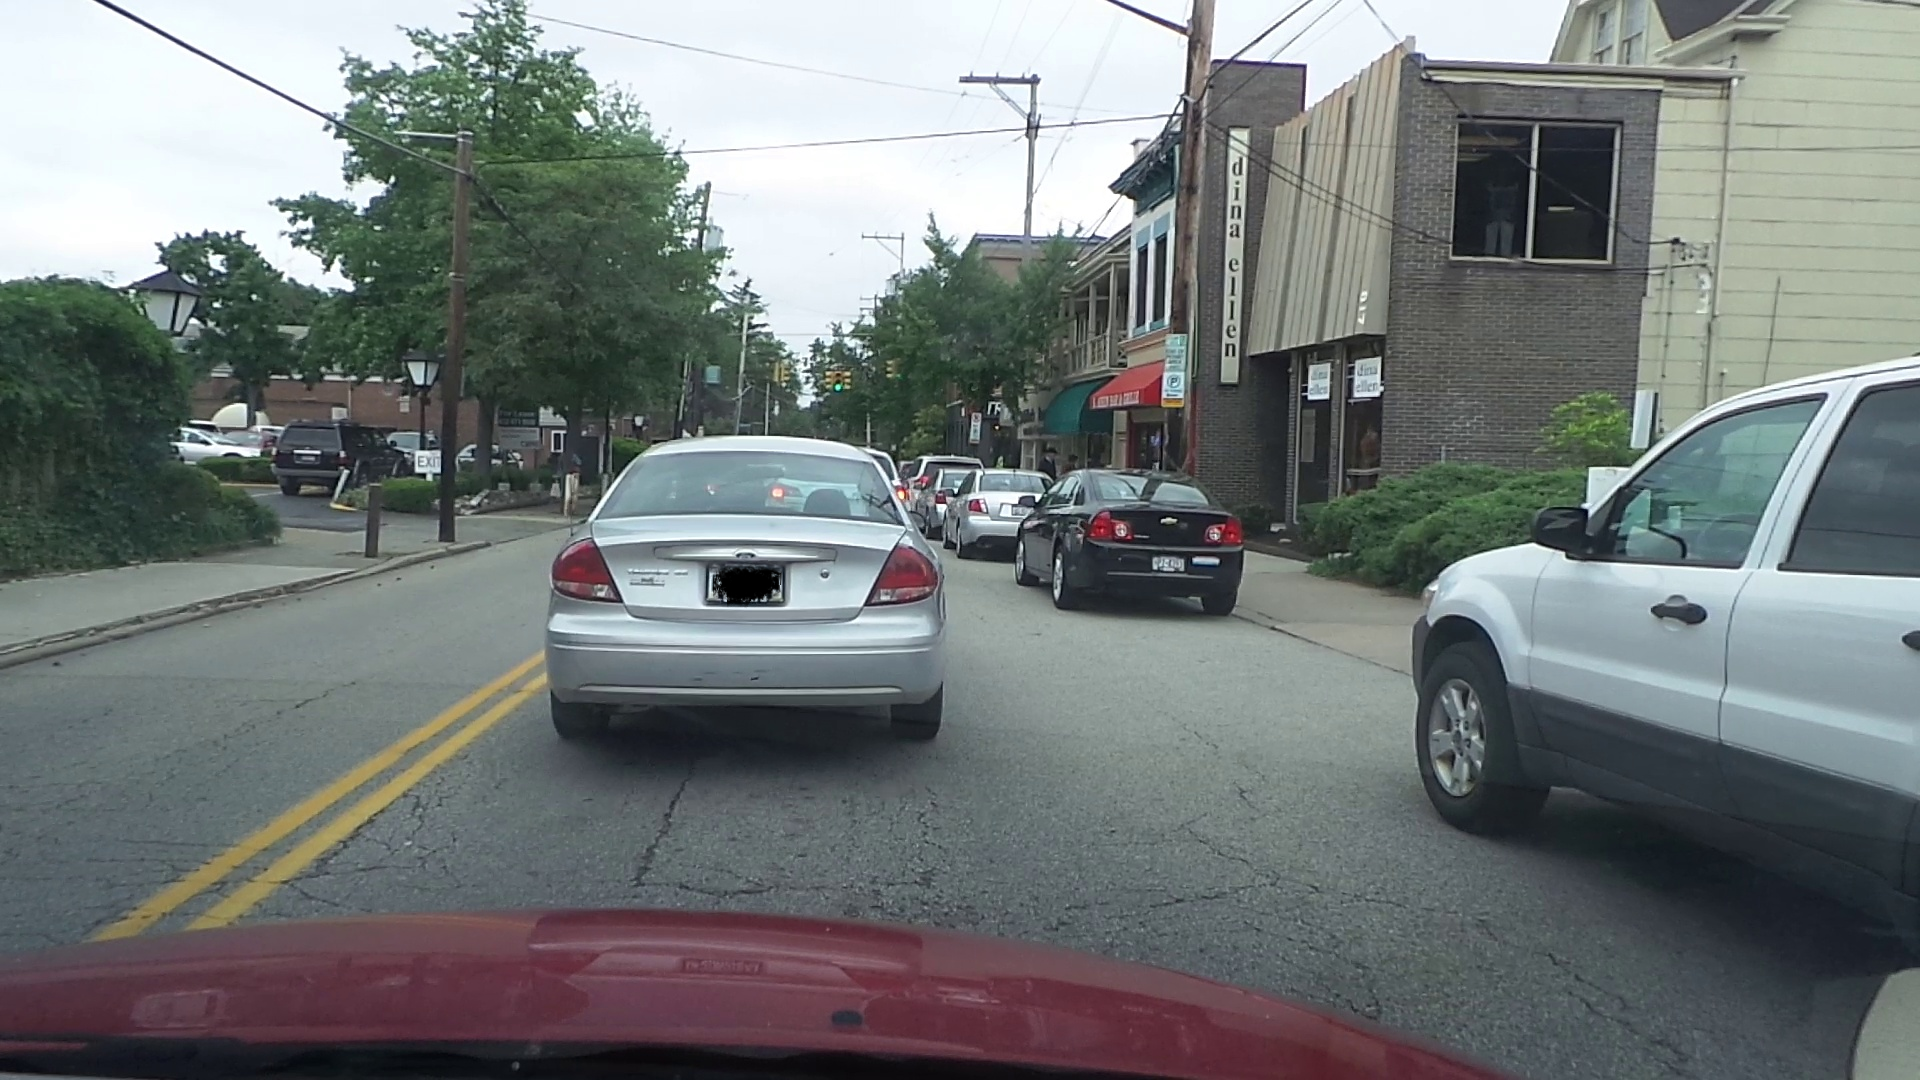
By turning the camera’s power on and looking at the LCD display; you should be able to adjust the camera view to the needed angle. The preferred view should look similar to the below pictures.
Ø The camera should be approximately looking down the center of the vehicle
Ø There should be some part of the hood in the image as well as some sky
Ø For the snow plow, it is very important that the mirror on the right is visible
A example of camera view on a snow plow:
A example of camera view on a sedan:
Downloading the Image Data to your Computer
Remove the camera from the mount inside the
truck:
The data will be in the RoadSensing directory. Depending on your setting choices it will be on the device or on the microSD card (the default is the microSD card). To download it you have three options:
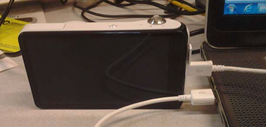
Option 1: Connect the camera to your computer with a USB cable while the camera is switched on or in sleep mode. (i.e. for this process you will
need the camera’s USB cable to connect the 2 devices.
The camera will need to be powered on, or in sleep
mode for files to be transferred.)Download all the data from the directory Computer/EK-GC100/Card/RoadSensing.
Option 2: Remove the microSD card, insert it into a reader (commonly you need an adapter that you plug into your computer), and download all the data from the directory RoadSensing
Option 3: Make sure that “Upload to S3” (in Settings) is enabled and camera is connected to Wifi. Data will upload automatically to Amazon Web Services.
Configuration of AWS S3 account for receiving uploaded videos
1. Create account / Log in to http://console.aws.amazon.com/
2. Under Storage & Content Delivery, click S3
3. Click Create a Bucket button
4. Name the bucket, the region should always be US Standard, click Create (no need to set up logging). For this example we will use the name roadsensing. Note that the bucket names must be UNIQUE to ALL USERS in S3, have to be lowercase letter, numbers, periods(.), and hyphens(-).
5. Go back to the main console page (click cube on top left)
6. Under Mobile Devices, click Cognito
7. Click Create new identity pool
8. Enter a new identity pool name (this does not matter)
9. Make sure to CHECK the box for Enable access to unauthenticated identities
10. Click Create Pool
11. Expand View Details dropdown
12. For BOTH Roles, expand the View Policy Document Dropdown
13. Edit both policies to the policy document shown below (note the use of the previously selected bucket name (roadsensing) in the policy:
14. Click Allow
Policy Document:
{
  "Version": "2012-10-17",
  "Statement":[{
    "Effect": "Allow",
    "Action": "s3:*",
    "Resource": ["arn:aws:s3:::roadsensing",
                 "arn:aws:s3:::roadsensing/*"]
    }
  ]
}
To get data from the AWS to a computer of your choice you can use the a browser, log into your AWS and use the interface. You can also use a command line interface: https://aws.amazon.com/cli/
You need to set up permissions, but at the end you only need one command to get all the data:
$ aws s3 mv s3://roadsensing/new . --recursive
